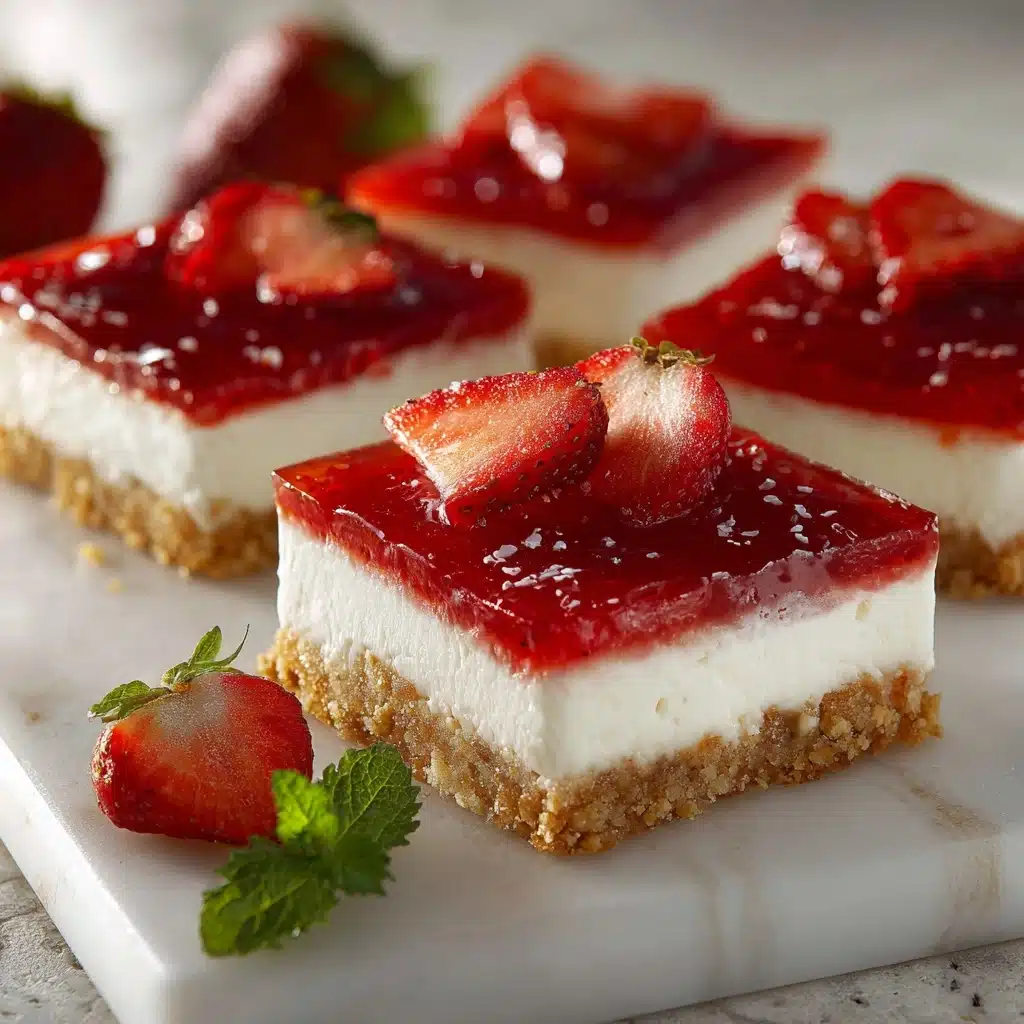
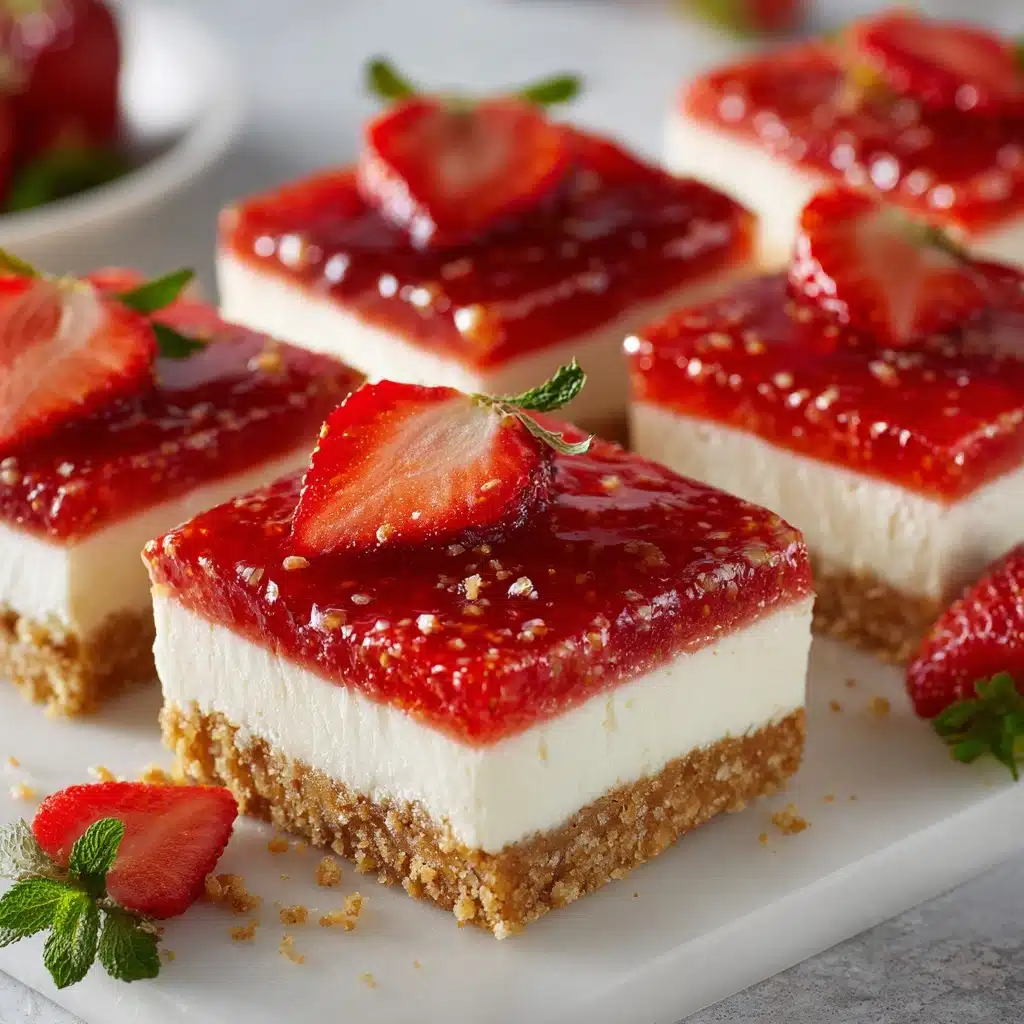
No-Bake Strawberry Cheesecake Bars Recipe
If you’re looking for a dessert that’s as delightful as it is easy to make, these No-Bake Strawberry Cheesecake Bars are your new best friend. Imagine a perfectly buttery graham cracker crust giving way to a luxuriously creamy cheesecake filling, all crowned with a vibrant, sweet strawberry topping that bursts with fresh flavor. This delicious treat requires no oven time and comes together quickly, making it perfect for everything from casual get-togethers to special celebrations. Every bite offers a refreshing balance of textures and tastes that’s sure to impress and satisfy your sweet tooth.
Ingredients You’ll Need
These ingredients might look simple, but each one plays a crucial role in creating the unforgettable taste, texture, and appearance of your No-Bake Strawberry Cheesecake Bars. From the buttery crust to the luscious cheesecake and fruity topping, every component works in harmony.
- Graham cracker crumbs (1 ½ cups): Provides the perfect crunchy and slightly sweet base for the crust.
- Granulated sugar (⅓ cup + ¼ cup): Adds sweetness to both the crust and strawberry topping, balancing flavors beautifully.
- Unsalted butter (½ cup, melted): Holds the crust together and adds a rich, buttery flavor.
- Cream cheese (2 cups, softened): The creamy star of the cheesecake filling that makes it rich and smooth.
- Powdered sugar (1 cup): Sweetens the filling while ensuring it stays silky without any graininess.
- Vanilla extract (1 teaspoon): Enhances the cheesecake’s flavor with a fragrant warmth.
- Heavy cream (2 cups): Whipped to fluffy perfection, it lightens up the cheesecake filling.
- Fresh strawberries (2 cups, hulled and chopped): The fresh fruit topping that adds natural sweetness and vibrant color.
- Lemon juice (1 tablespoon): Brightens the strawberry topping with a touch of tanginess.
How to Make No-Bake Strawberry Cheesecake Bars
Step 1: Make the Crust
Start by combining the graham cracker crumbs and sugar then stirring in the melted butter until the mixture resembles wet sand. Press this mixture firmly into the bottom of your baking dish—it’s important to pack it tightly so the crust holds together when you slice the bars. Pop it into the fridge to chill while you move on to the filling. This step sets the stage for a sturdy yet tender base that supports the luscious layers above.
Step 2: Prepare the Cheesecake Filling
Using an electric mixer, beat the softened cream cheese until smooth and creamy; this eliminates any lumps and gives the filling its decadent texture. Slowly mix in the powdered sugar and vanilla extract for sweetness and flavor depth. In a separate bowl, whip the heavy cream until you get stiff peaks—this lightens the dense cream cheese, resulting in a fluffy, airy cheesecake layer. Gently fold the whipped cream into the cream cheese mixture to keep all that fluff intact, then spread the filling evenly over your chilled crust. Smooth the surface with a spatula for a polished look and even texture.
Step 3: Make the Strawberry Topping
Combine the chopped strawberries, sugar, and lemon juice in a small saucepan and heat over medium, stirring occasionally until the berries break down and the mixture becomes syrupy. This gentle cooking process intensifies the natural sweetness and releases gorgeous red juices that will make the topping irresistibly glossy. Let the mixture cool completely before layering it onto the cheesecake—this step is essential to prevent melting or sogginess. If you prefer a smoother topping, feel free to mash the strawberries lightly or even blend them for a more uniform texture.
Step 4: Assemble the Bars
Once your strawberry topping has cooled, spoon it lovingly over the cheesecake filling and spread it out evenly. Now, the bars need some patience—they taste best after chilling for at least four hours in the refrigerator, and ideally overnight. This chilling time allows each layer to set beautifully, making sure every bar slices cleanly and holds its shape perfectly when served.
Step 5: Serve
Once chilled and set, cut your No-Bake Strawberry Cheesecake Bars into squares or bars, whatever shape you fancy. Each bite delivers that heavenly combination of buttery crust, creamy cheesecake filling, and bright, fruity strawberry topping—pure joy in every mouthful. Serve chilled for a refreshing treat that’s sure to delight everyone at your table.
How to Serve No-Bake Strawberry Cheesecake Bars
Garnishes
A dusting of powdered sugar or a few fresh strawberry slices on top can add an elegant finishing touch and extra pop of color. For a hint of indulgence, a dollop of whipped cream or a sprinkle of finely chopped mint provides a refreshing contrast and enhances visual appeal. Garnishes may be subtle, but they add that little something special that makes the bars irresistible to the eye and the palate.
Side Dishes
Pairing your No-Bake Strawberry Cheesecake Bars with light, complementary accompaniments can elevate your dessert experience. Fresh fruit salads, a scoop of vanilla ice cream, or even a hot cup of coffee or tea create lovely balance. These sides neither overpower the bars nor overshadow the fresh strawberry flavor—it’s all about harmony and enhancing every bite.
Creative Ways to Present
For an extra wow factor, try layering the cheesecake bars in clear glass jars or serving them in individual mini mason jars for single portions. You could also cut them into bite-sized squares and arrange them on a beautiful platter with fresh strawberry slices and mint leaves scattered artistically. Presentation has a way of making an already delicious dessert feel truly special and memorable.
Make Ahead and Storage
Storing Leftovers
Your No-Bake Strawberry Cheesecake Bars store wonderfully in the refrigerator, covered tightly with plastic wrap or kept in an airtight container. They stay fresh and creamy for 3 to 4 days, making them a great dessert to prepare ahead of time or enjoy as a ready-to-go treat.
Freezing
If you want to keep these bars longer, they freeze beautifully. Wrap individual squares with plastic wrap and place them in a freezer-safe container or bag. Frozen cheesecake bars can last up to 1 month. When you’re ready, thaw them overnight in the fridge for the best texture and taste—avoid microwaving or reheating, which can compromise their creamy perfection.
Reheating
Since these bars are best enjoyed cold and creamy, reheating is not recommended. The texture and flavors shine brightest straight from the fridge, so simply slice and serve chilling for that perfect bite every time.
FAQs
Can I use frozen strawberries for the topping?
Absolutely! If fresh strawberries aren’t in season, frozen ones work as a great alternative. Just thaw and drain any excess water before cooking to avoid a watery topping.
How do I make these bars vegan?
To make vegan No-Bake Strawberry Cheesecake Bars, substitute the cream cheese with a plant-based alternative and use a coconut cream or other dairy-free whipped topping instead of heavy cream. Also, be sure your crust ingredients align with vegan preferences.
Can I make these bars without gelatin?
Yes, this recipe does not require gelatin at all. The filling sets using whipped cream and cream cheese, making it naturally creamy and firm without needing any gelatin.
What if I don’t have an electric mixer?
While an electric mixer makes whipping the filling easier and fluffier, you can still make these bars by beating the cream cheese and sugar vigorously by hand and whipping the cream with a whisk—it just takes a bit more elbow grease!
How do I prevent the crust from becoming soggy?
Chilling the crust before adding the filling is key to keeping it firm. Also, pressing it firmly and evenly helps it hold its shape. If desired, you can lightly bake the crust for 5 minutes before chilling to add extra firmness, but it’s not required for this no-bake recipe.
Final Thoughts
There’s something truly special about the ease and elegance of these No-Bake Strawberry Cheesecake Bars. Whether you’re a seasoned baker or someone looking for a fuss-free dessert with impressive results, this recipe delivers creamy, fruity, and utterly delicious bars every time. I encourage you to try making them soon—you’ll be hooked on their fresh flavor and silky texture in no time! Sharing this with friends and family will guarantee smiles all around.