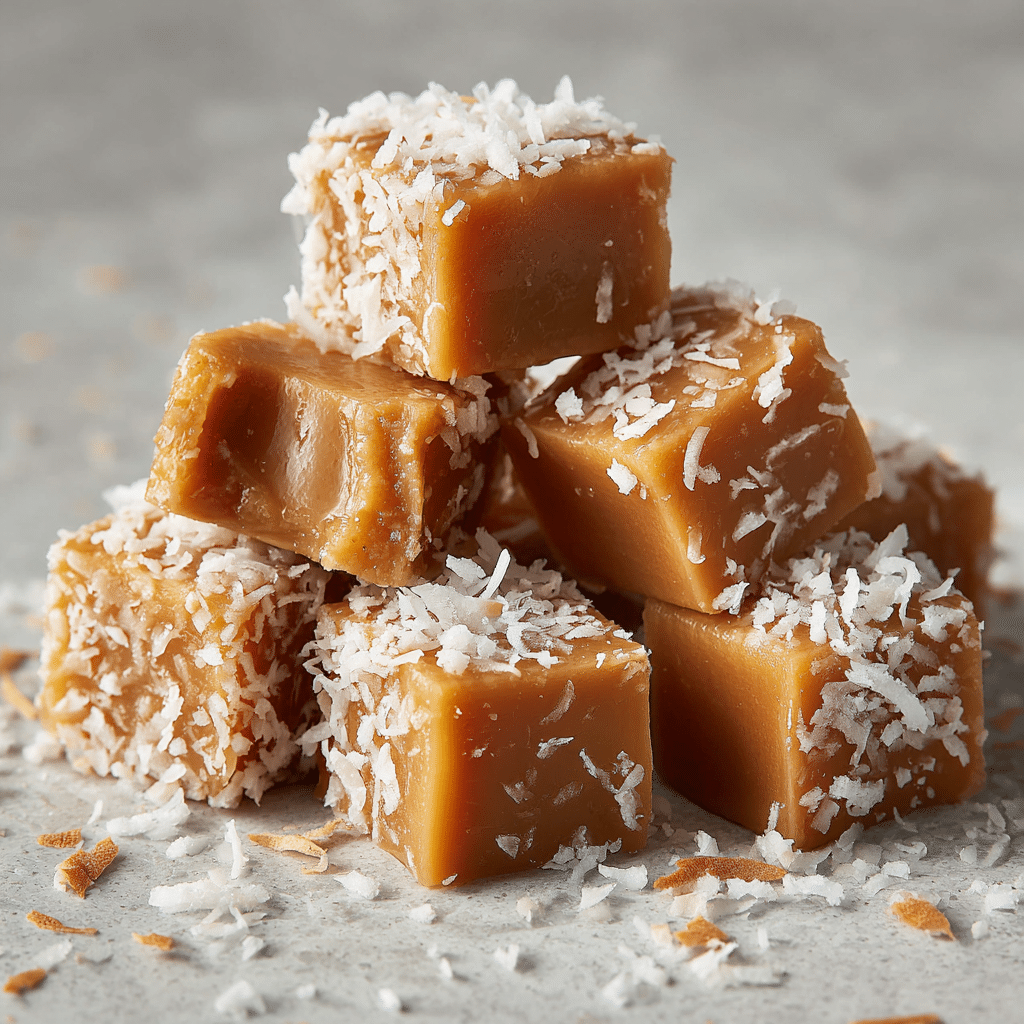
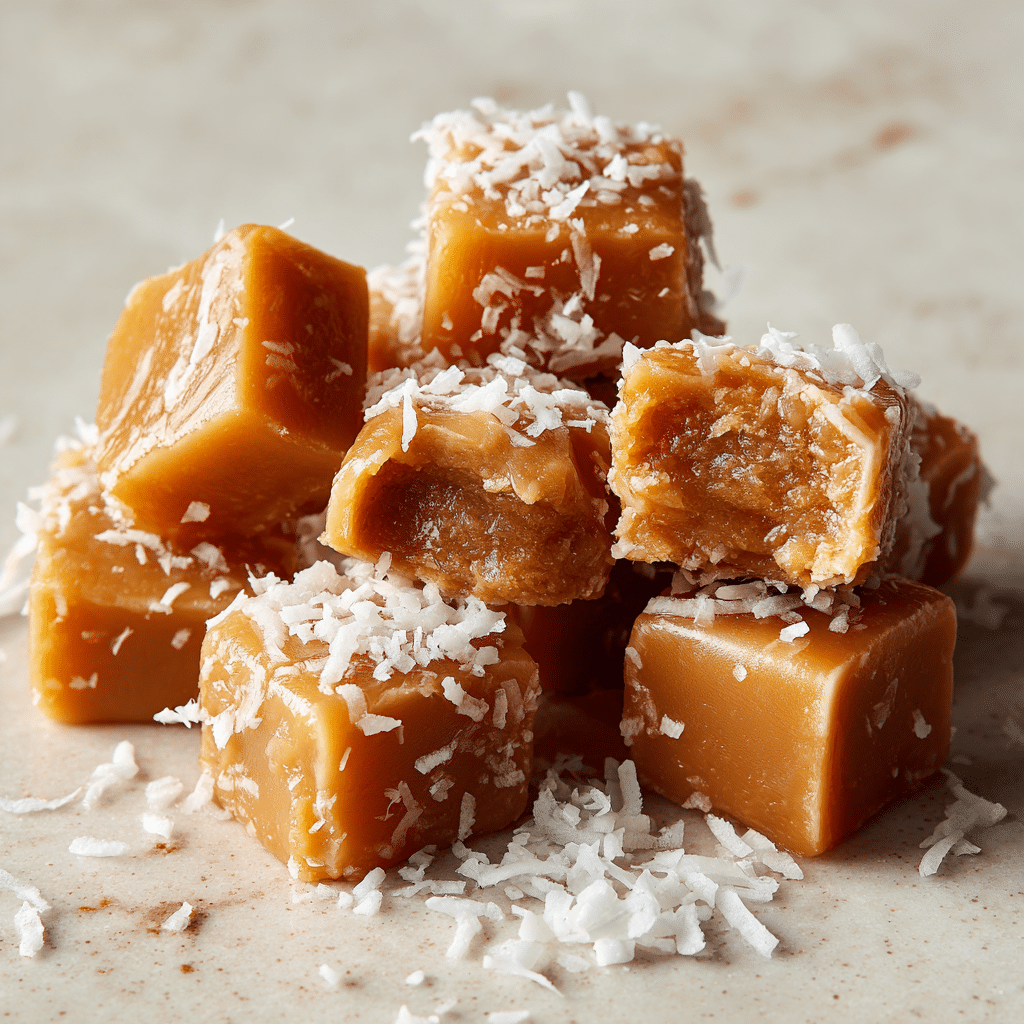
Toasted Coconut Caramels Recipe
If you love the rich, buttery goodness of caramel and the irresistible crunch of toasted coconut, then these Toasted Coconut Caramels are about to become your new favorite treat. They bring together the perfect balance of soft, chewy caramel with a warm, nutty tropical twist that makes every bite pure bliss. Whether you’re looking for a homemade gift or a special sweet to enjoy yourself, these caramels are a delightful indulgence that hits all the right notes.
Ingredients You’ll Need
The magic of Toasted Coconut Caramels lies in their simplicity. Each ingredient plays a crucial role in creating that perfect texture and flavor — from the creamy butter to the luscious cream and the bright sweetness of sugar. And, of course, the toasted coconut adds that signature nutty crunch that elevates this caramel to the next level.
- Sugar: Provides the essential sweetness and caramelizes into that rich golden base.
- Cream: Adds the smooth, velvety texture that makes these caramels soft and luscious.
- Butter: Infuses the caramel with a rich, buttery flavor that melts in your mouth.
- Toasted coconut: Brings a toasty, nutty flavor and a satisfyingly light crunch that complements the chewy caramel perfectly.
How to Make Toasted Coconut Caramels
Step 1: Toast the Coconut
Start by gently toasting the coconut flakes in a dry skillet over medium heat until they turn a beautiful golden brown and release their warm aroma. This step is key to unlocking that deep, nutty flavor that sets the entire recipe apart.
Step 2: Combine Sugar, Cream, and Butter
In a heavy-bottomed saucepan, combine the sugar, cream, and butter. Heat them gently while stirring often so the sugar dissolves completely. It’s important to keep the mixture moving to prevent burning and to help everything meld into a smooth, luscious blend.
Step 3: Simmer Until Thick and Golden
Allow the mixture to simmer on medium heat, stirring frequently, until it thickens and develops a gorgeous golden caramel color. This usually takes around 10 to 15 minutes. You’ll know it’s ready when it coats the back of a spoon and starts pulling away from the pot edges.
Step 4: Stir in the Toasted Coconut
Once your caramel base has reached the perfect consistency, fold in the toasted coconut flakes. Mixing them in now ensures every bite gets a burst of that crisp, nutty flavor, perfectly contrasting the soft caramel.
Step 5: Pour, Cool, and Cut
Pour the hot caramel mixture into a lined baking tray, spreading it evenly. Let it cool completely at room temperature so it sets just right. Once firm, cut into bite-sized squares that you’ll want to savor one after another — it’s that good!
How to Serve Toasted Coconut Caramels
Garnishes
For an extra touch of elegance and a flavor boost, sprinkle a few flaky sea salt crystals or a light dusting of finely shredded toasted coconut on top right after pouring the caramel into the tray. It adds a lovely texture contrast and highlights the tropical notes beautifully.
Side Dishes
These Toasted Coconut Caramels are a perfect sweet companion to a cup of freshly brewed coffee or a fragrant chai latte. Their rich flavors also pair wonderfully with a scoop of vanilla ice cream, where the warm caramel meets cold creaminess.
Creative Ways to Present
Wrap individual caramels in parchment paper or colorful cellophane to create charming little favors for parties or gifts. You can also layer them in a decorative jar, tied with a ribbon, for an inviting homemade present that anyone would love to receive.
Make Ahead and Storage
Storing Leftovers
You can keep your Toasted Coconut Caramels fresh by storing them in an airtight container at room temperature. They’ll stay perfectly soft and chewy for up to 7 to 10 days, making them an excellent make-ahead treat for when you want a quick sweet fix.
Freezing
If you want to keep your caramels longer, freeze them in a well-sealed container or wrapped tightly in plastic and foil. When stored properly, they can last for up to a month. Thaw at room temperature before serving for the best texture.
Reheating
Caramels are best enjoyed as they are but if you prefer a slightly softened texture, you can warm them gently in the microwave for a few seconds. Just be careful not to overheat, or you might lose that perfect chewy consistency!
FAQs
Can I use sweetened coconut flakes instead of unsweetened?
Yes, but be mindful that sweetened coconut will add extra sugar to the caramels, which can impact sweetness and texture. If you prefer a less sweet treat, unsweetened toasted coconut is usually the best choice.
What kind of cream is best for this recipe?
Heavy cream is ideal because its high-fat content gives the caramels a rich, smooth texture. Half-and-half or milk will not yield the same silky consistency and may alter the flavor slightly.
How do I know when the caramel mixture is ready?
The caramel is ready when it turns a deep golden color and thickens enough to coat the back of a spoon. You can also do a simple test by dropping a bit into cold water — it should form a soft, pliable ball.
Can I add other flavors to my Toasted Coconut Caramels?
Absolutely! A splash of vanilla extract, a pinch of sea salt, or a hint of spice like cinnamon can enhance the flavor. Just add these toward the end of cooking just before pouring into the tray.
Why do the caramels need to cool before cutting?
Cooling allows the caramel to set properly so it holds its shape when cut. If you try to cut them too early, they will be sticky and lose their clean edges.
Final Thoughts
Making these Toasted Coconut Caramels is a joyful experience that fills your kitchen with warm, inviting aromas and rewards you with a sweet treat that’s hard to forget. Once you try them, they will become your go-to homemade candy to share with friends or enjoy during any cozy moment. Give them a try—you’ll be so glad you did!