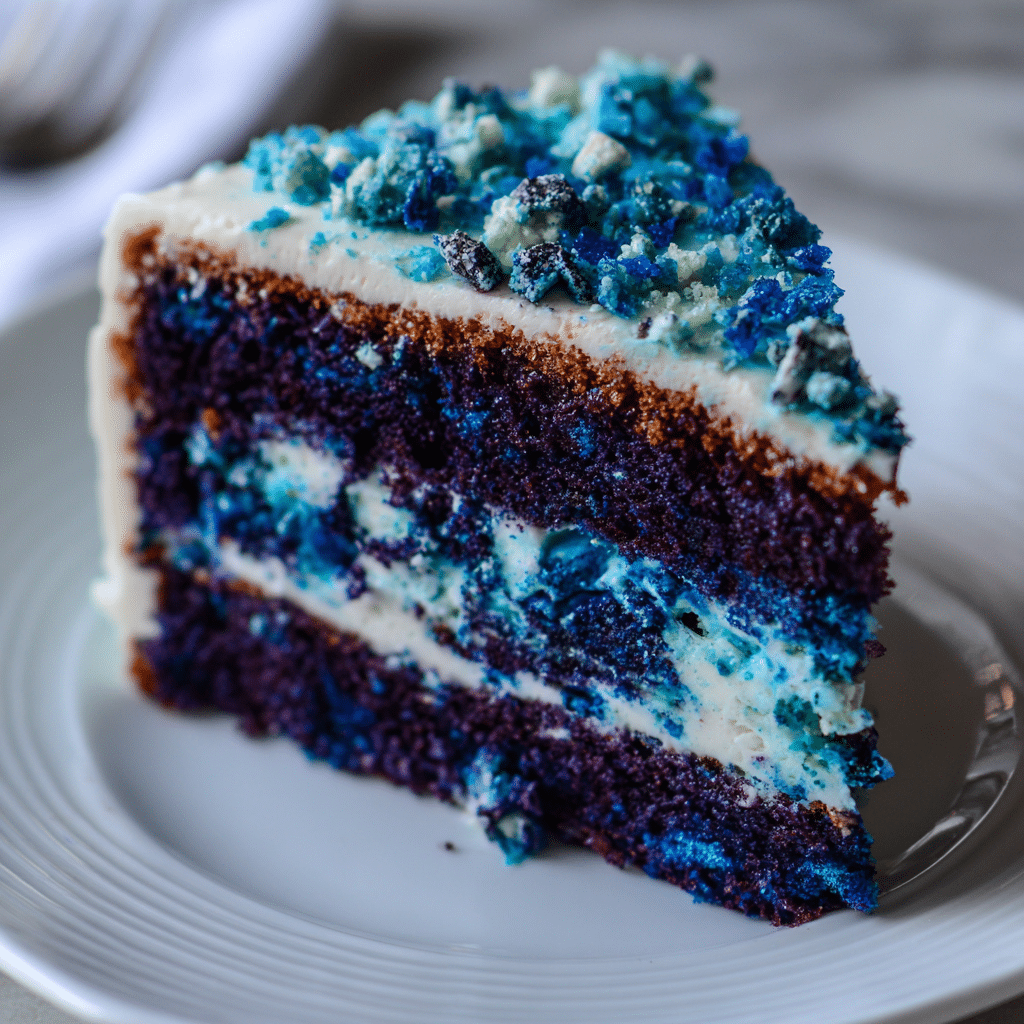
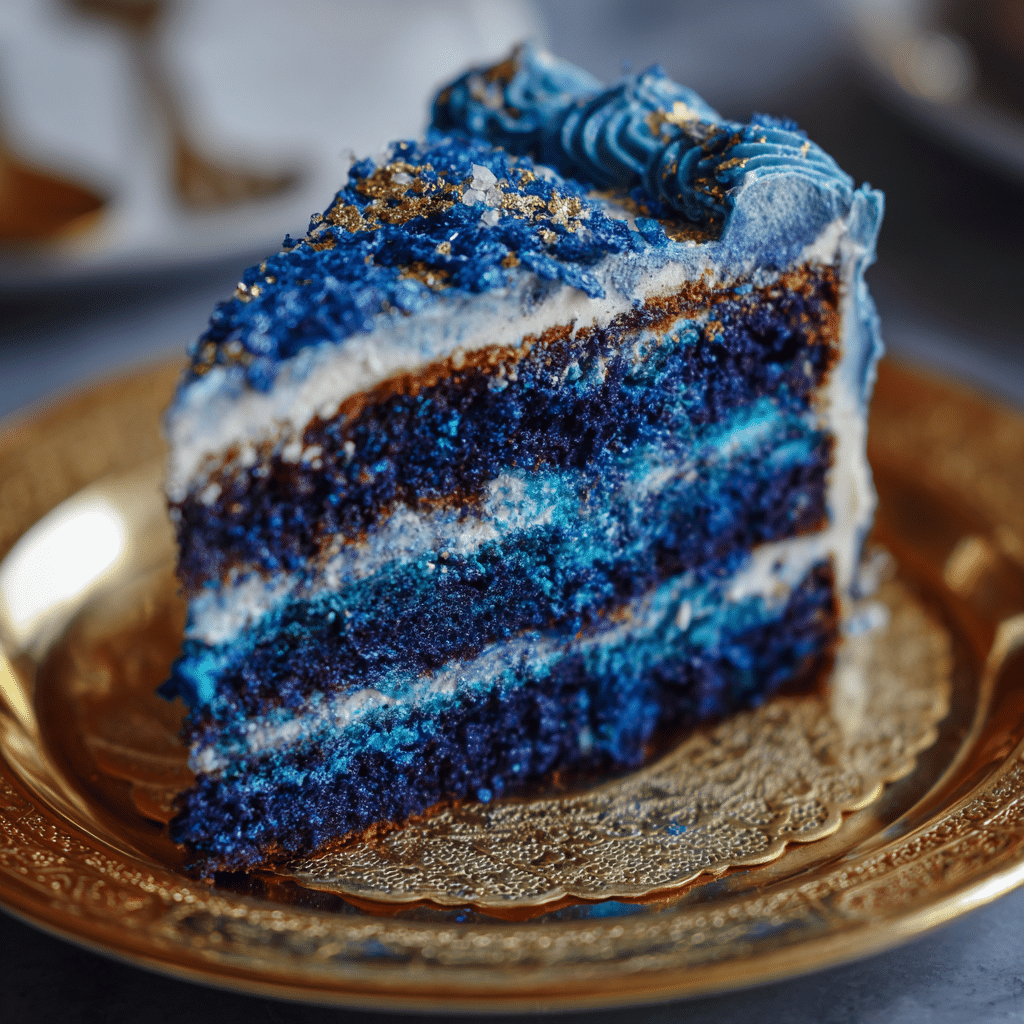
Blue Velvet Cake Recipe
If you’re looking for a dessert that dazzles with its unique hue and delivers a moist, tender crumb with every bite, then you are going to fall head over heels for this Blue Velvet Cake. Rich and velvety, this cake not only impresses visually with its stunning blue color but also delights your palate with a subtle cocoa undertone and a luscious cream cheese frosting. Whether you’re celebrating a special occasion or just want to treat yourself to something extraordinary, the Blue Velvet Cake is a showstopper that blends classic indulgence with a creative twist.
Ingredients You’ll Need
Gathering the right ingredients is key to achieving that perfect balance of texture, flavor, and that captivating blue tone in your Blue Velvet Cake. Each component plays a crucial role, from the slight tang of buttermilk to the vibrant food coloring that brings the cake to life.
- All-purpose flour: Provides the structure for a tender, yet sturdy cake crumb.
- Cocoa powder: Adds a subtle chocolate flavor that pairs beautifully with the blue color.
- Baking soda: Helps the cake rise perfectly, creating a light and fluffy texture.
- Salt: Enhances the overall flavors and balances sweetness.
- Unsalted butter: Brings richness and moisture to the cake.
- Granulated sugar: Sweetens the cake and helps with moisture retention.
- Eggs: Bind ingredients together and add to the cake’s richness.
- Buttermilk: Adds tang and moisture, making the cake delightfully soft.
- White vinegar: Reacts with baking soda for an extra lift and tender crumb.
- Vanilla extract: Provides a warm, aromatic background note.
- Blue gel food coloring: The star ingredient responsible for the signature blue hue of the Blue Velvet Cake.
- Cream cheese: Essential for the frosting’s tangy richness.
- Powdered sugar: Sweetens and thickens the frosting while keeping it smooth.
- Heavy cream: Helps to achieve the perfect frosting consistency and extra creaminess.
How to Make Blue Velvet Cake
Step 1: Prepare Your Oven and Pans
Start by preheating your oven to 350°F (175°C). Grease and lightly flour two 8-inch round cake pans, or line them with parchment paper to ensure your cakes release easily after baking.
Step 2: Mix Dry Ingredients
In a large bowl, sift together the flour, cocoa powder, baking soda, and salt. Combining these dry ingredients thoroughly sets the foundation for an even-textured Blue Velvet Cake with no lumps.
Step 3: Cream Butter and Sugar
Using a stand mixer or hand mixer, beat the butter and granulated sugar until light and fluffy—this step is essential because it aerates the batter, resulting in a lighter cake.
Step 4: Add Eggs and Vanilla
Beat in the eggs one at a time, ensuring each is fully incorporated before adding the next. Then, mix in the vanilla extract for that signature warm undertone.
Step 5: Combine Wet Ingredients and Coloring
In a separate bowl, whisk together the buttermilk, white vinegar, and blue gel food coloring until you achieve your desired shade of blue (the more coloring, the vivid the cake!).
Step 6: Alternate Adding Dry and Wet Ingredients
Gradually add the dry ingredients to the butter mixture, alternating with the colored buttermilk, beginning and ending with the dry mix. This alternating method prevents overmixing and keeps the batter tender and moist.
Step 7: Bake the Cake
Divide the batter evenly between the prepared pans and bake for 25–30 minutes, or until a toothpick inserted in the center comes out clean. Once done, let the cakes cool in the pans for about 10 minutes before turning them out onto wire racks to cool completely.
Step 8: Make the Cream Cheese Frosting
Meanwhile, beat together the cream cheese and softened butter until smooth and creamy. Gradually add powdered sugar, then blend in heavy cream to reach a luscious, spreadable consistency perfect for frosting your Blue Velvet Cake.
Step 9: Assemble and Frost
Once your cake layers are completely cooled, spread an even layer of cream cheese frosting on top of one layer, then gently place the second layer on top. Finish by frosting the top and sides generously—don’t be shy with it, as this frosting is an essential part of what makes the Blue Velvet Cake so irresistible!
How to Serve Blue Velvet Cake
Garnishes
To elevate your Blue Velvet Cake visually and flavor-wise, consider garnishing with fresh berries such as blueberries or raspberries that complement the color and offer a burst of natural sweetness. A light dusting of edible silver glitter or shredded white chocolate curls adds an elegant touch that will wow your guests.
Side Dishes
Because the Blue Velvet Cake is richly flavored and slightly tangy, it pairs wonderfully with simple sides like freshly brewed coffee or a scoop of vanilla bean ice cream. For a party, a refreshing citrus salad or a glass of sparkling lemonade can balance out the richness beautifully.
Creative Ways to Present
Make your Blue Velvet Cake the centerpiece by serving it on a decorative cake stand with a blue-themed table setting. Alternatively, turn the cake into individual cupcakes or layer it with mousse for a fancy dessert trifle—each presentation keeps the fun blue theme alive and adds a personalized touch.
Make Ahead and Storage
Storing Leftovers
Once frosted, keep your Blue Velvet Cake covered in an airtight container at room temperature if you plan to eat it within two days. Beyond that, refrigeration is best to maintain freshness and prevent the cream cheese frosting from spoiling.
Freezing
You can freeze unfrosted cake layers tightly wrapped in plastic wrap and then in foil for up to three months. When ready to use, thaw overnight in the refrigerator before frosting. If you want to freeze a fully frosted Blue Velvet Cake, do so for up to two weeks, wrapped well to avoid freezer burn.
Reheating
This cake is best enjoyed chilled or at room temperature, so reheating isn’t necessary. However, if you prefer your cake slightly warm, remove it from the refrigerator and let it sit at room temperature for about 30 minutes before serving—this will help restore the creamy frosting texture and moist crumb.
FAQs
What makes Blue Velvet Cake different from Red Velvet Cake?
Blue Velvet Cake uses blue food coloring and a hint of cocoa powder, while traditional Red Velvet Cake features red coloring alongside a slight cocoa flavor. Blue Velvet offers a fresh twist on the classic with its vibrant hue, but both share a moist texture and cream cheese frosting.
Can I use natural food coloring for this cake?
Natural blue food colorings do exist, but they tend to produce a more muted hue and can sometimes affect flavor. Gel food coloring is preferred for achieving the striking blue tone that defines the Blue Velvet Cake.
Is this cake suitable for special occasions?
Absolutely! The Blue Velvet Cake’s impressive color and rich flavor make it a fantastic choice for birthdays, baby showers, gender reveal parties, or any event where you want a colorful and memorable dessert.
How do I prevent the cake from crumbling when cutting?
Use a sharp knife chilled in hot water and wiped dry before slicing. Make slow, deliberate cuts to keep the cake neat. Also, chilling the frosted cake slightly before slicing can help maintain its shape.
Can I make this cake gluten-free?
Yes, you can substitute the all-purpose flour with a gluten-free baking mix designed for cakes. Be sure it includes xanthan gum for structure, and adjust the baking time as needed since gluten-free flours sometimes bake differently.
Final Thoughts
Trust me when I say this Blue Velvet Cake belongs in your baking repertoire—it’s stunning, delicious, and surprisingly easy to make once you have the right ingredients. Your friends and family will be amazed by its vibrant color and classic cream cheese frosting that steals the show. So go ahead, give this recipe a try and bring a splash of blue to your dessert table that tastes just as fantastic as it looks!