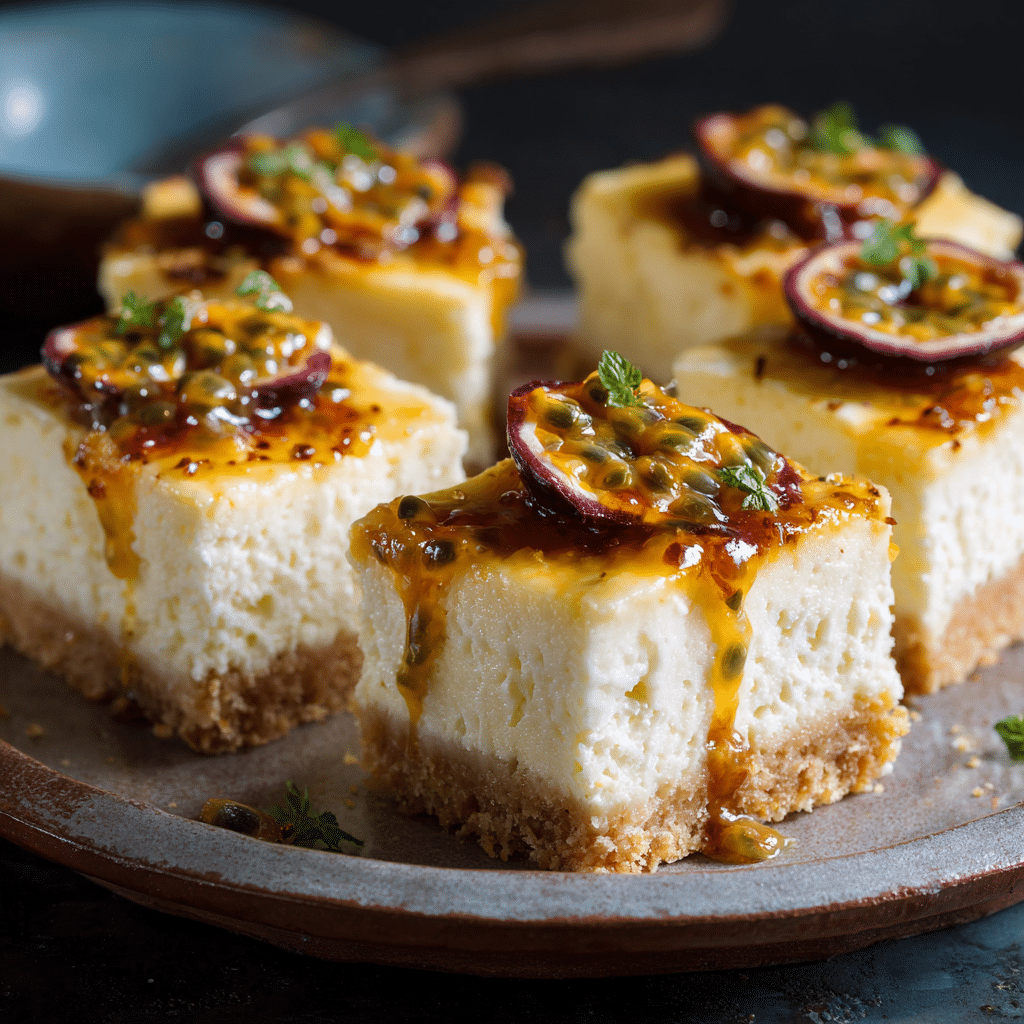
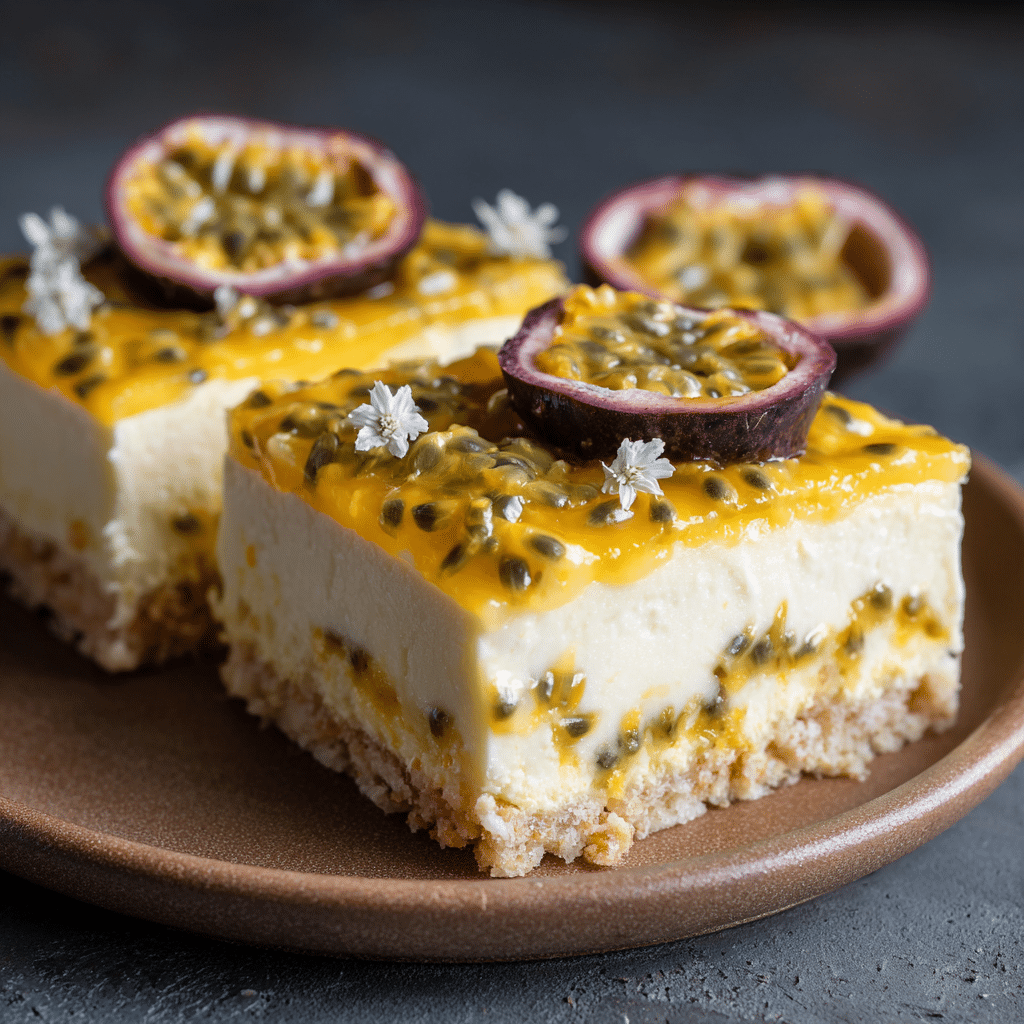
Passion Fruit Cheesecake Bars: Exotic & Creamy Recipe
If you’re craving a dessert that bursts with tropical charm and creamy decadence, you absolutely have to try these Passion Fruit Cheesecake Bars: Exotic & Creamy. This recipe transforms classic cheesecake squares into a vibrant, tangy treat thanks to luscious passion fruit puree. Every bite is a delightful harmony of sweet richness and bright, fruity zest, finished with a delicate glaze that makes these bars just as stunning as they are delicious.
Ingredients You’ll Need
The simplicity of this recipe is part of its magic. Each ingredient plays a crucial role in balancing the creamy texture, tropical flavor, and beautiful appearance of the Passion Fruit Cheesecake Bars: Exotic & Creamy.
- Graham cracker crumbs: The crunchy base that provides a buttery, slightly sweet foundation.
- Unsalted butter: Melted to bind the crust ingredients together, adding richness and moisture.
- Cream cheese: The star of the show for that smooth, velvety cheesecake texture.
- Sugar: Sweetens the batter just right to complement the tartness of passion fruit.
- Eggs: Helps set the cheesecake filling to perfect sliceable consistency.
- Vanilla extract: Adds warmth and depth to the flavor profile.
- Passion fruit puree: Infuses the cheesecake with tropical tang and vibrant color.
- Powdered sugar: For the delicate glaze that adds a subtle sweetness and glossy finish.
- Lemon juice: Boosts the tartness, balancing sweetness and enhancing the fruity notes.
How to Make Passion Fruit Cheesecake Bars: Exotic & Creamy
Step 1: Prepare the Crust
Start by combining graham cracker crumbs with melted butter to create that perfect crumbly base. Press this mixture firmly into a lined baking pan to ensure it holds together well during baking. This crust provides a satisfying crunch that contrasts beautifully with the creamy filling.
Step 2: Mix the Cheesecake Filling
In a large bowl, beat the cream cheese until smooth, then gradually add sugar and continue beating until creamy and light. Incorporate eggs one at a time, blending well after each addition. Stir in vanilla extract and passion fruit puree to infuse the filling with that exotic, tangy flavor that makes these bars so irresistible.
Step 3: Bake the Bars
Pour the passion fruit cheesecake mixture over the crust, spreading evenly. Bake at a moderate temperature to allow the filling to set gently without cracking. Keep an eye on the edges and center; the bars should be firm but still a little jiggly to the touch when done.
Step 4: Prepare the Glaze
While the bars are cooling, whisk together powdered sugar and lemon juice to create a light glaze. This finishing touch enhances the tart sweetness and adds a beautiful sheen that makes the bars visually irresistible.
Step 5: Glaze and Chill
Once the cheesecake bars have cooled to room temperature, drizzle the glaze evenly over the top. Refrigerate for several hours or overnight to allow the flavors to meld and the texture to fully firm up.
How to Serve Passion Fruit Cheesecake Bars: Exotic & Creamy
Garnishes
For a show-stopping presentation, top the bars with fresh passion fruit seeds or thin slices of tropical fruit like mango or kiwi. A sprinkle of toasted coconut flakes adds texture and a complementary nutty flavor.
Side Dishes
Pair these cheesecake bars with a light, refreshing side like chilled mint tea or sparkling water infused with cucumber and lime to balance the richness with a clean finish.
Creative Ways to Present
Cut the bars into small squares and serve on a platter dusted with edible flowers or lime zest for an exotic, elegant touch. Individual servings in mini glass jars layered with whipped cream and passion fruit pulp turn this dessert into a stunning tropical parfait.
Make Ahead and Storage
Storing Leftovers
Keep any leftover Passion Fruit Cheesecake Bars: Exotic & Creamy covered tightly in the refrigerator. They will stay fresh and creamy for up to 4 days, making them perfect for preparing in advance for parties or special occasions.
Freezing
You can freeze these bars by wrapping them individually in plastic wrap and placing them in an airtight container. When frozen, they hold their flavor and texture for up to 2 months. Thaw in the refrigerator overnight before serving.
Reheating
Cheesecake bars are best enjoyed chilled, so reheating is not recommended. If you prefer, you can let them sit at room temperature for 10 to 15 minutes to soften slightly before serving.
FAQs
Can I use canned passion fruit puree for this recipe?
Absolutely! Canned passion fruit puree works wonderfully and often has a consistent flavor. Just make sure it is unsweetened to maintain the perfect balance of tartness in the bars.
What if I don’t have graham crackers for the crust?
Crushed digestive biscuits or vanilla wafers make excellent alternatives and will keep that buttery, crunchy texture needed for the base.
Can I make this recipe vegan?
You can substitute cream cheese with a vegan cream cheese alternative and use flax eggs instead of regular eggs, but keep in mind the texture may be slightly different. The passion fruit flavor will still shine through beautifully.
How do I know when the cheesecake bars are done baking?
The bars are ready when the edges look set and barely start to brown, while the center still has a slight jiggle. Overbaking can lead to cracks and a dry texture, so err on the side of gentle baking.
What is the best way to cut the bars without them crumbling?
Allow the bars to chill completely in the fridge first. Use a sharp knife warmed under hot water and wiped dry before slicing to get clean, smooth edges without crumbling.
Final Thoughts
These Passion Fruit Cheesecake Bars: Exotic & Creamy bring a wonderful tropical twist to the classic cheesecake experience that’s truly unforgettable. They’re perfect for impressing guests or treating yourself to something special. Once you try them, you’ll want to keep this recipe on hand for every occasion where a little sweetness and sunshine is needed. Give them a go—you won’t regret it!