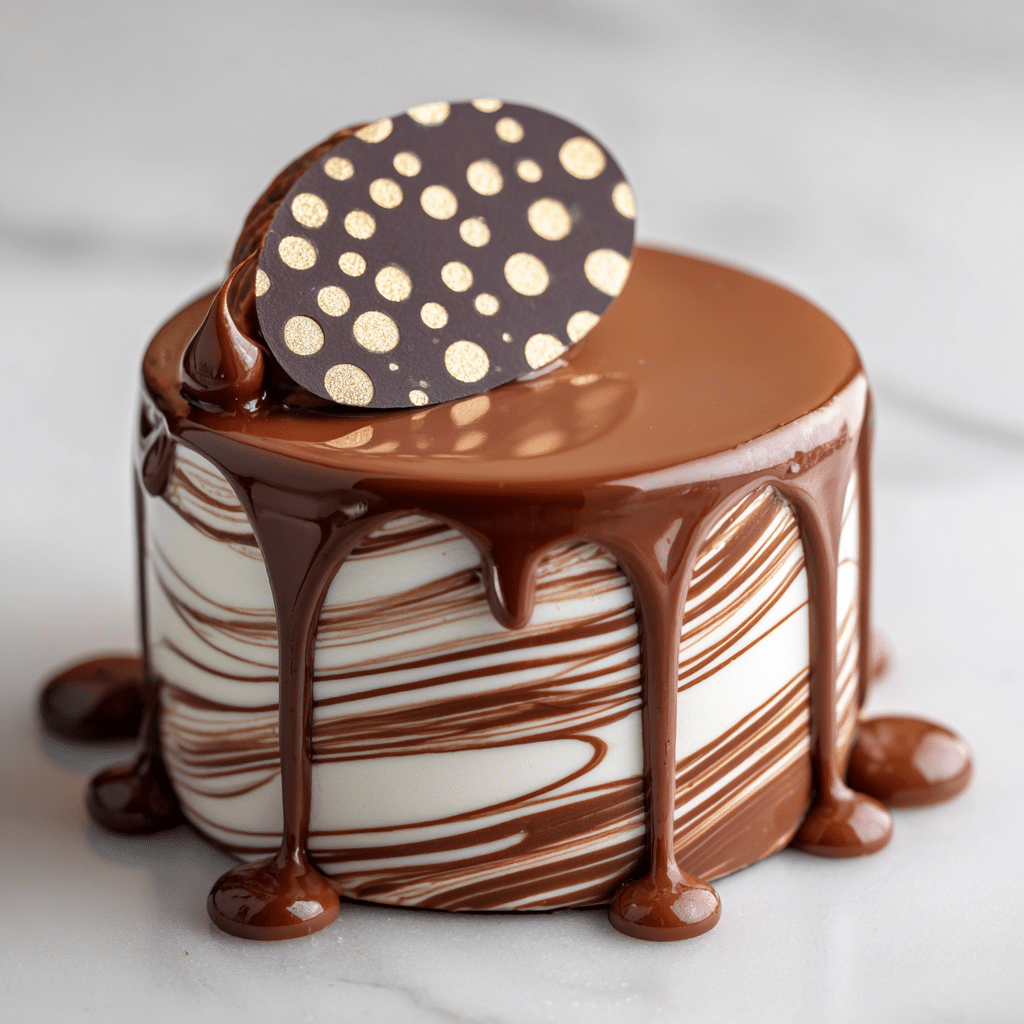
Chocolate Line with Cream Dot Recipe
If you adore the beauty of simplicity in your desserts, the Chocolate Line with Cream Dot is a stunning way to elevate your plating game. This elegant presentation uses a thin, clean line of rich chocolate sauce streaked across your plate, paired perfectly with a single, delicate dot of velvety cream. It’s a minimalist masterpiece that turns your dish into an edible work of art, proving that sometimes less truly is more when it comes to making a memorable impression.
Ingredients You’ll Need
The magic behind the Chocolate Line with Cream Dot lies in its simplicity, with just a few essential ingredients that come together beautifully. Each component adds a crucial touch, whether it’s the glossy sheen of the chocolate or the smooth richness of the cream that contrasts perfectly on the plate.
- High-quality dark chocolate: Choose chocolate with at least 60% cocoa for a deep, intense flavor and smooth texture when melted.
- Heavy cream: Provides a luscious, creamy dot that balances the richness of the chocolate with its lightness and subtle sweetness.
- Butter (optional): Adding a bit of butter to the melted chocolate makes the line shinier and silkier for that perfect glossy finish.
- Sugar (optional): A pinch of sugar in the cream can add a touch of sweetness if preferred, enhancing the contrast without overpowering the flavors.
- Vanilla extract (optional): A hint of vanilla in the cream dot can bring warmth and depth, making the pairing even more irresistible.
How to Make Chocolate Line with Cream Dot
Step 1: Prepare the Chocolate Sauce
Start by chopping your chocolate finely so it melts evenly and smoothly. Gently melt the chocolate with a small knob of butter in a heatproof bowl over simmering water, stirring consistently until glossy and lump-free. This step ensures your chocolate line won’t crack or become dull once set on the plate.
Step 2: Make the Cream Dot
Whip a small amount of heavy cream just until it reaches soft peaks—this will give your cream dot a lovely yet stable texture that holds its shape beautifully. If you like, add a splash of vanilla or a pinch of sugar at this stage to enhance the flavor delicately but be careful not to over-whip.
Step 3: Plate the Chocolate Line
Using the back of a small spoon or a fine paintbrush, carefully draw a thin, straight line of melted chocolate across your serving plate. Keep your hand steady for a clean and elegant line, as this will be the focal point of your dessert presentation.
Step 4: Add the Cream Dot
Finally, place a small dollop of the whipped cream right on or slightly touching the chocolate line. This single dot contrasts beautifully against the dark line, creating a minimalist yet striking visual effect that speaks volumes about the artistry of your plating.
How to Serve Chocolate Line with Cream Dot
Garnishes
While the Chocolate Line with Cream Dot shines through minimalism, a tiny touch of fresh mint or a sprinkle of crushed toasted nuts can add a pleasant surprise of texture and a hint of color without overpowering the design. Edible gold leaf or a light dusting of cocoa powder can also elevate the look if you want to impress guests.
Side Dishes
This artistic presentation pairs wonderfully with desserts that have simple yet rich flavors, like a classic vanilla panna cotta or a delicate almond financier. The chocolate and cream add a sophisticated flair without stealing the spotlight, allowing your dessert’s main flavors to dance on the palate.
Creative Ways to Present
Experiment with the shape and placement of your chocolate line and cream dot to suit different occasions. Try a gentle curve or diagonal line for a dynamic twist, or mirror the dot with two cream drops at either end of the chocolate streak. Feel free to use colored plates to make your simple but stunning artwork pop even more dramatically.
Make Ahead and Storage
Storing Leftovers
If you have any leftover melted chocolate or whipped cream, store the chocolate in an airtight container at room temperature, away from heat and humidity to preserve its texture. Keep the whipped cream refrigerated in a sealed container, but note that it’s best used fresh for the perfect dollop effect.
Freezing
While you can freeze melted chocolate for later use, it’s not ideal for plating because it can lose its glossy finish upon thawing. Whipped cream can be frozen but tends to lose its texture, so for the perfect Chocolate Line with Cream Dot, fresh preparation is recommended.
Reheating
Gently reheat your chocolate over a double boiler if it begins to set before plating. Avoid microwaving as it may cause the chocolate to seize or become grainy. The cream dot is best freshly whipped right before serving to maintain the smooth and dreamy texture.
FAQs
Can I use milk or white chocolate instead of dark chocolate?
Absolutely! Milk or white chocolate will give a sweeter, creamier line, which can be a lovely variation. Just be mindful that white chocolate melts at a lower temperature, so work carefully to avoid burning.
What if I don’t have a pastry brush or spoon for the chocolate line?
A small offset spatula or even the edge of a knife can work well for drawing the chocolate line. Just ensure it’s a thin, steady stroke to keep the line clean and elegant.
How do I prevent the chocolate line from breaking after it hardens?
Make sure your chocolate is melted properly with butter for flexibility and apply it evenly while still warm on plates that aren’t too cold or warm. Allow it to set gently at room temperature.
Can I prepare the cream dot ahead of time?
It’s best to whip the cream just before plating to maintain its light texture and fresh appearance. If needed, lightly re-whip after refrigeration but avoid overdoing it.
Is the Chocolate Line with Cream Dot suitable for all types of desserts?
Yes! This design is incredibly versatile and can complement everything from plated pastries and cakes to mousse and fruit-based desserts, adding an elegant visual touch without overwhelming the dish.
Final Thoughts
There’s something truly special about the Chocolate Line with Cream Dot that combines artistry and taste in such a simple yet powerful way. If you love elevating your desserts with style and sophistication, this plate decoration will become one of your trusted favorites. Give it a try next time you want to impress someone with less effort but maximum wow.