Oreo Ice Cream Cups Recipe
If you have a serious sweet tooth and love the classic combo of chocolate and cream, this Oreo Ice Cream Cups Recipe will become your new favorite treat in no time. Imagine creamy vanilla ice cream nestled between layers of crunchy crushed Oreo cookies, topped with luscious chocolate sauce and a fluffy cloud of whipped cream. It’s the perfect mix of textures and flavors that’s super simple to whip up and impossible to resist. Whether you want to impress guests or treat yourself on a sunny afternoon, these delightful cups are guaranteed to bring a smile to your face and joy to your taste buds.
Ingredients You’ll Need
Gathering the right ingredients is half the fun, and luckily, this Oreo Ice Cream Cups Recipe calls for simple, easy-to-find items that pack a flavorful punch. Each component adds its own special touch — the Oreos contribute crunch and deep chocolatey goodness, while the vanilla ice cream brings silky creaminess. Chocolate sauce and chips add richness and a little extra chocolate kick, and the whipped cream pulls everything together with airy sweetness.
- Oreo cookies: These crumbly gems provide that signature chocolate crunch and a hint of creamy filling to contrast the ice cream.
- Vanilla ice cream: Opt for a high-quality vanilla ice cream to ensure a smooth, creamy base that complements the Oreos perfectly.
- Chocolate sauce: Drizzle this on top for rich, gooey indulgence that enhances every bite.
- Whipped cream: Adds a light, fluffy texture and a delicate sweetness to balance the intense chocolate flavors.
- Chocolate chips: For a fun, melt-in-your-mouth finish and a little added texture boost.
How to Make Oreo Ice Cream Cups Recipe
Step 1: Crush the Oreo Cookies
Start by taking a handful of Oreo cookies and crushing them into coarse crumbs. You want enough to make several crunchy layers in your cups without turning the crumbs into powder. Crushing them by hand or using a zip-top bag and rolling pin works perfectly and keeps some chunkiness for texture.
Step 2: Layer the First Crust of Oreo Crumbs
Take your favorite dessert cups or small clear glasses and spoon a generous layer of the crushed Oreos into the bottom. This first layer creates a delicious chocolate base that contrasts beautifully with the creamy ice cream to come.
Step 3: Add Vanilla Ice Cream
Next, scoop a thick layer of vanilla ice cream over the Oreo base. You want it to be nice and even to create a creamy middle layer. Press gently to help it settle but try not to melt it too much—working quickly helps keep the texture just right.
Step 4: Repeat Layers
Add another sprinkle of crushed Oreos over the ice cream, then another scoop of vanilla ice cream. Building these alternating layers traps little pockets of crunch and cream in every bite, making the dessert irresistibly fun to eat.
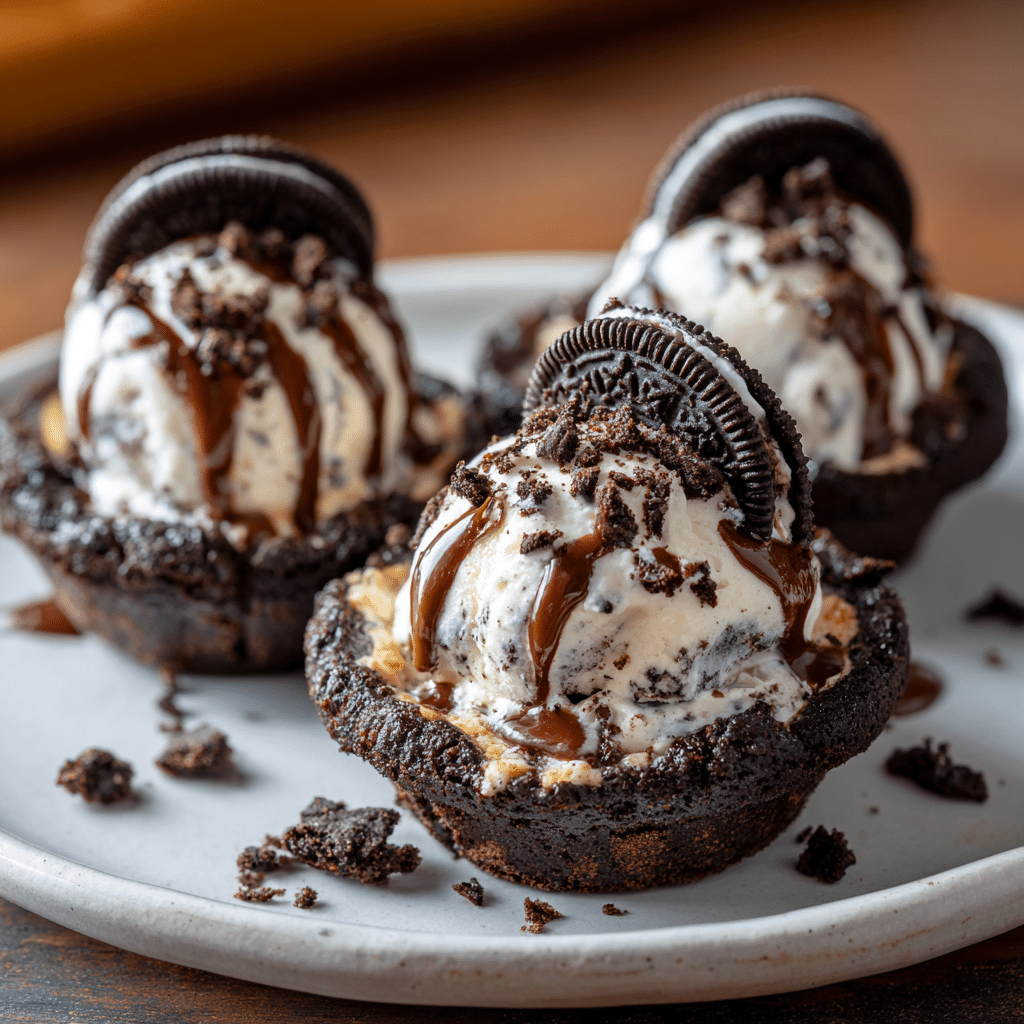
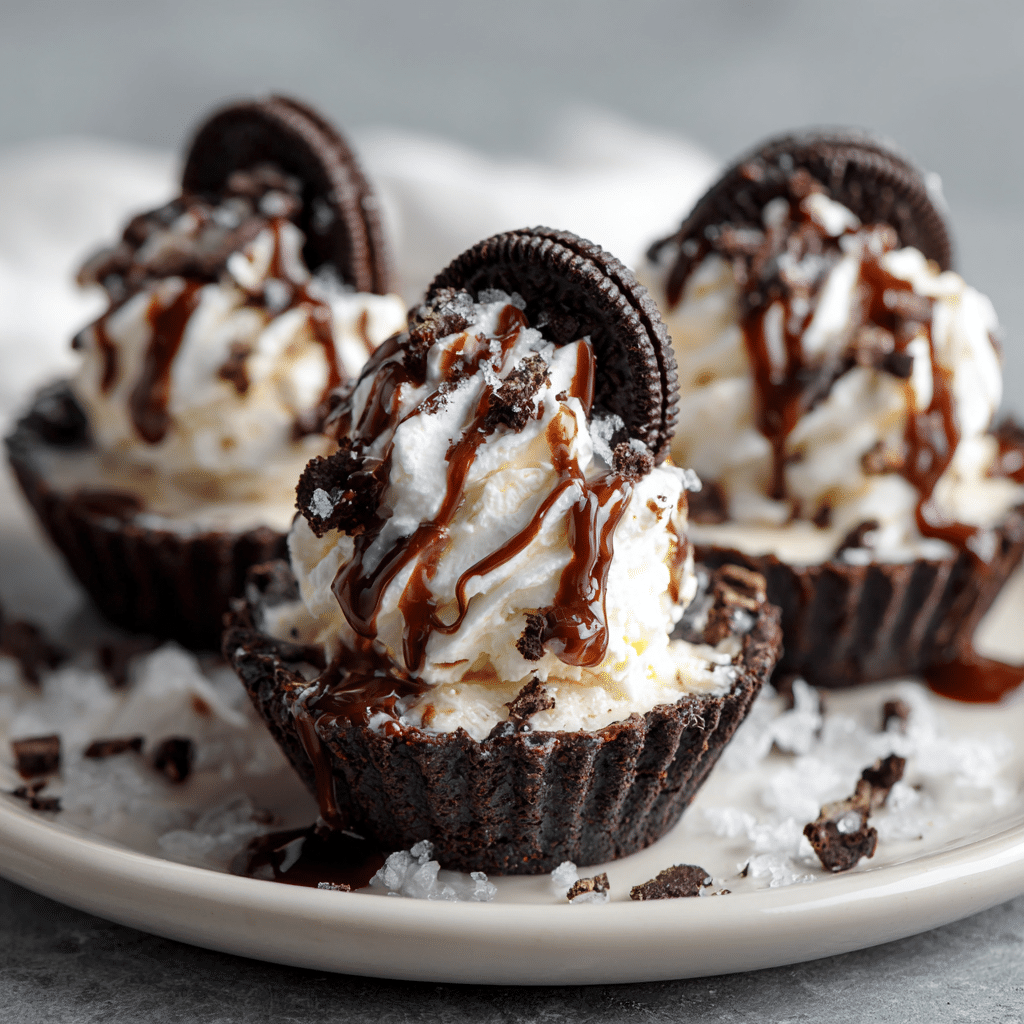
Step 5: Top with Chocolate Sauce and Whipped Cream
Now for the crowning glory! Drizzle a generous swirl of chocolate sauce over the top, then add a fluffy dollop of whipped cream. Don’t forget to scatter a handful of chocolate chips over the whipped cream for that perfect final chocolatey touch.
Step 6: Freeze Briefly Before Serving
Pop your Oreo Ice Cream Cups into the freezer for about 20-30 minutes to let everything set and the chocolate sauce to firm up slightly. This quick chill makes them perfectly cold but still easy to scoop and enjoy.
How to Serve Oreo Ice Cream Cups Recipe
Garnishes
For an extra special presentation, add a whole Oreo cookie on top or sprinkle some mini chocolate chips for texture contrast. A little fresh mint can also brighten the look and flavor beautifully.
Side Dishes
These cups make an incredible standalone dessert, but if you want to turn your dessert into a celebration, consider serving alongside fresh berries or a warm brownie square for a decadent duo.
Creative Ways to Present
Try layering the Oreo Ice Cream Cups Recipe into mason jars for a charming, rustic look. You can also use waffle cones or hollowed-out chocolate cups as edible containers for a playful twist that doubles the delight.
Make Ahead and Storage
Storing Leftovers
If you happen to have leftovers (though that rarely happens), cover the cups tightly with plastic wrap or an airtight lid and stash them in the freezer to keep their freshness and texture intact.
Freezing
The Oreo Ice Cream Cups Recipe freezes wonderfully. Just be sure to let them thaw for a few minutes before serving so the ice cream softens slightly and scooping is easier.
Reheating
Since these are frozen treats, reheating isn’t necessary, but if you want warm chocolate sauce, you can heat a small amount separately and drizzle it warm over the frozen cups for an exciting temperature contrast.
FAQs
Can I use other ice cream flavors?
Absolutely! While vanilla highlights the Oreo flavors best, feel free to experiment with cookies and cream, chocolate, or even mint chocolate chip for a fun twist.
How long can I store Oreo Ice Cream Cups in the freezer?
They’re best enjoyed within a week for optimal freshness and texture, but properly sealed cups can last up to two weeks without loss of flavor.
Can I make these dairy-free?
Yes! Use dairy-free or vegan vanilla ice cream and whipped cream alternatives, and be sure to check that the Oreos and chocolate sauce fit your dietary needs.
What type of chocolate sauce works best?
A rich, smooth chocolate fudge sauce or hot fudge topping pairs beautifully here, but feel free to use your favorite store-bought or homemade version.
Can children help make this recipe?
Definitely! Crushing Oreos and layering the cups is a fun and easy activity for kids, plus it gets them excited about making and enjoying their own dessert.
Final Thoughts
Now that you have all the tips and steps to create this heavenly Oreo Ice Cream Cups Recipe, I hope you feel inspired to make a batch and share it with your loved ones. It’s a joyfully simple dessert that combines familiar flavors in a playful, irresistible way. Go ahead and treat yourself—you deserve it!