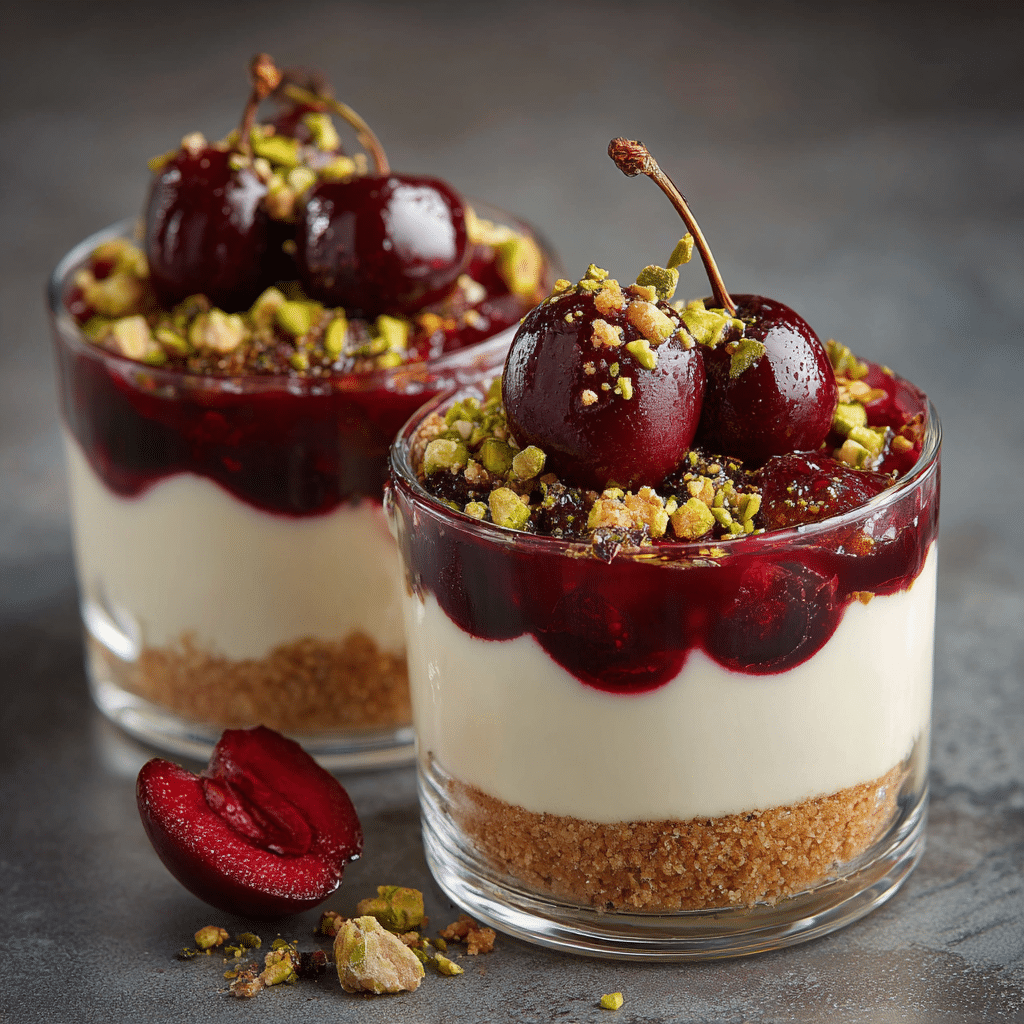
Cherry Pistachio Cheesecake Cups Recipe
If you’re searching for a dessert that perfectly balances creamy richness, fruity sweetness, and a satisfying crunch, look no further than this Cherry Pistachio Cheesecake Cups Recipe. This delightful treat brings together smooth cream cheese, luscious cherries, and toasted pistachios layered over crunchy graham cracker crumbs, all served in cute individual cups for easy sharing and presentation. It’s the kind of dessert that feels both indulgent and fresh, making every bite a little celebration on your palate.
Ingredients You’ll Need
Gathering the right ingredients for this Cherry Pistachio Cheesecake Cups Recipe is wonderfully straightforward. Each component plays a vital role, from creating a creamy texture to adding bursts of flavor and color that make the dessert truly special.
- Cream cheese: The star ingredient for a smooth and tangy cheesecake base that melts in your mouth.
- Cherries: Fresh or preserved cherries add juicy sweetness and a vibrant pop of color.
- Pistachios: These provide a delightful crunch and a subtle nutty flavor that complements the creaminess perfectly.
- Sugar: Sweetens the cheesecake filling just right without overpowering the natural tartness of the cherries.
- Graham crackers: Crushed into crumbs, they form a crisp and buttery foundation for the layers.
How to Make Cherry Pistachio Cheesecake Cups Recipe
Step 1: Prepare the Graham Cracker Crust
Start by crushing your graham crackers into fine crumbs, either by hand in a ziplock bag with a rolling pin or using a food processor for ease. This base provides that addictive crunch you’ll love beneath every creamy layer. Set the crumbs aside for layering later.
Step 2: Mix the Cheesecake Filling
In a bowl, beat the cream cheese until velvety smooth. Add sugar gradually, continuing to blend until the mixture is creamy and slightly fluffy. This filling is the rich heart of your Cherry Pistachio Cheesecake Cups Recipe, so take a moment to enjoy the texture.
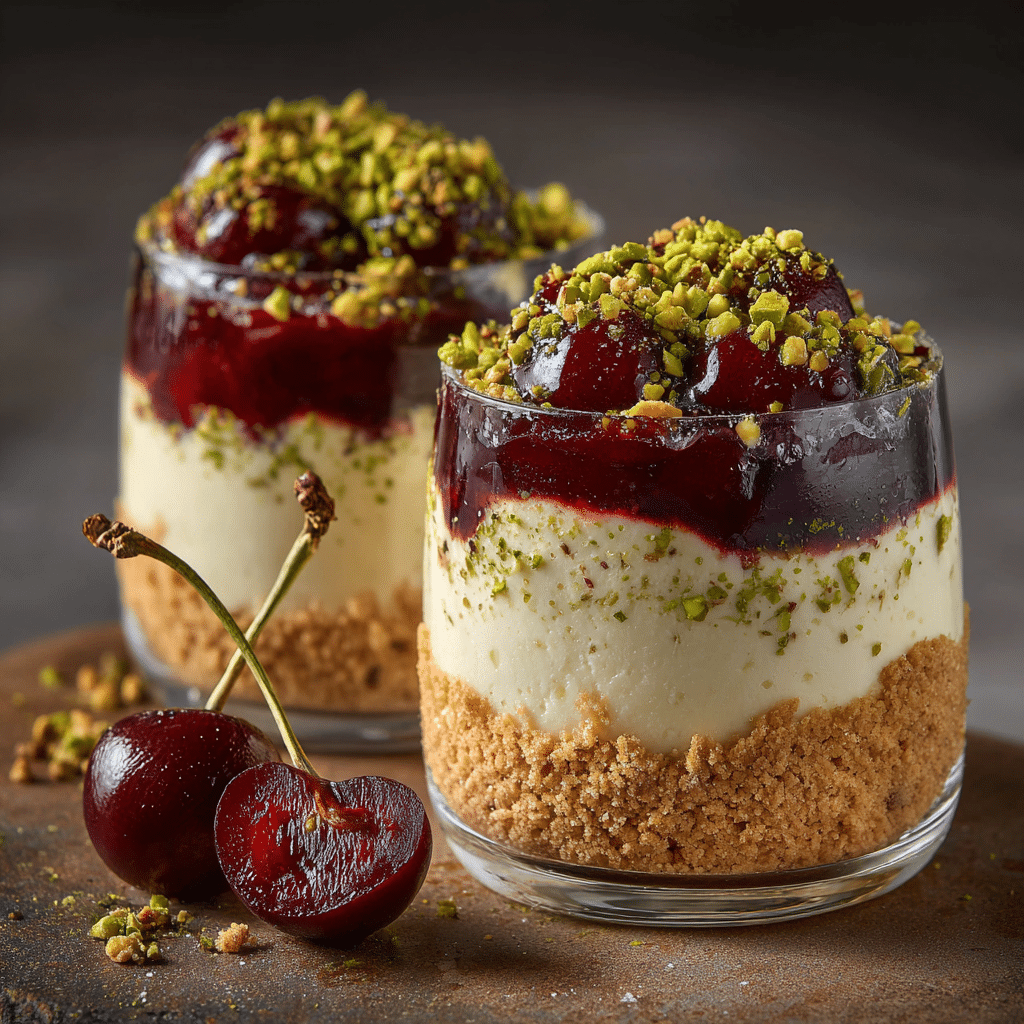
Step 3: Assemble the Layers
Grab your serving cups and begin by spooning a layer of graham cracker crumbs into the bottom. Next, add a generous dollop of the cheesecake mixture, smoothing it over the crumbs. Follow with a spoonful of cherries, spreading them evenly, then sprinkle some chopped pistachios on top to add that signature crunch and vibrant color.
Step 4: Repeat and Chill
Repeat the layering if your cups are tall enough for multiple layers, finishing with a sprinkle of pistachios on top for a beautiful presentation. Once assembled, place the cups in the fridge to chill for at least two hours. This step is crucial as it helps the cheesecake filling set and allows the flavors to meld wonderfully.
How to Serve Cherry Pistachio Cheesecake Cups Recipe
Garnishes
Elevate your presentation by adding a sprig of fresh mint or a light dusting of powdered sugar on top just before serving. A few whole pistachios or a cherry perched elegantly on the surface can also make the cups look irresistible and restaurant-worthy.
Side Dishes
These cheesecake cups pair beautifully with a simple cup of espresso or a glass of lightly sweet white wine. For a fruity accompaniment, consider serving alongside fresh berry salad or a citrus sorbet for a refreshing contrast.
Creative Ways to Present
Try serving the Cherry Pistachio Cheesecake Cups Recipe in clear mini mason jars or small stemmed glasses to showcase the beautiful layers. For a fun twist, top the cups with edible flowers or drizzle a little dark chocolate over the top to add elegance and indulgence.
Make Ahead and Storage
Storing Leftovers
Once assembled and chilled, these cheesecake cups store beautifully in the refrigerator. Keep them covered with plastic wrap or in an airtight container to maintain freshness and avoid any fridge odors mixing in. They’ll stay delicious for up to three days.
Freezing
If you want to prepare in advance or save some for later, freeze the cups before adding fresh cherries and pistachios on top. Wrap them tightly and store for up to one month. Thaw overnight in the fridge before serving, then add your toppings fresh for that perfect texture contrast.
Reheating
This dessert is best enjoyed chilled and should not be heated. Warming it will compromise the texture and flavor balance. Simply allow frozen cups to thaw in the fridge and enjoy cold for the best experience.
FAQs
Can I use frozen cherries for this recipe?
Yes, frozen cherries can be a great alternative if fresh ones are out of season. Just make sure to thaw and drain them well to avoid excess liquid diluting your cheesecake layers.
What type of cream cheese is best for this recipe?
Use full-fat cream cheese for the creamiest, richest texture. Low-fat versions may result in a less smooth filling that doesn’t set as well.
Can I substitute the pistachios for other nuts?
Absolutely! While pistachios add a unique flavor and color, toasted almonds, walnuts, or pecans would work nicely if you prefer or have allergies to pistachios.
How far ahead can I prepare these cheesecake cups?
You can assemble and chill them up to two days in advance. Just add fresh garnish and nuts right before serving to keep them looking fresh and tasting their best.
Is this recipe gluten-free?
The recipe as written uses graham crackers that usually contain gluten. To keep it gluten-free, simply substitute with gluten-free graham crackers or crushed gluten-free cookies.
Final Thoughts
There’s something truly special about the combination of creamy, fruity, and crunchy textures in the Cherry Pistachio Cheesecake Cups Recipe that feels both comforting and exciting. Whether you’re treating yourself or surprising guests, these cups turn a classic dessert into a fun, elegant experience that’s just waiting to become a new favorite. Give it a try—you won’t regret it.