Choco-Cheesecake Cookie Bites Recipe
Welcome to a delightful treat that perfectly balances indulgence and charm: the Choco-Cheesecake Cookie Bites Recipe. Imagine luscious, fudgy chocolate cookie crusts hugging a velvety cheesecake center, all in a perfectly bite-sized form. This recipe brings together two beloved desserts into one harmonious, irresistible bite that’s as fun to make as it is to eat. Whether you’re making it for a cozy night in, a festive gathering, or just because you deserve a sweet pick-me-up, these bites promise rich flavors and creamy textures that will keep everyone coming back for more.
Ingredients You’ll Need
All the magic of these cookie bites starts with a handful of simple, carefully chosen ingredients. Each element plays a vital role, whether it’s building the fudgy chocolate base or adding the creamy cheesecake filling that melts in your mouth.
- 1 cup all-purpose flour: The foundation that provides structure and a tender crumb to the chocolate cookie crust.
- 1/2 cup unsweetened cocoa powder: Brings the deep, intense chocolate flavor that makes these bites irresistible.
- 1/4 teaspoon baking powder: Just enough lift to keep the cookie layer from being too dense.
- 1/4 teaspoon salt: Enhances and balances the sweetness throughout the recipe.
- 1/2 cup unsalted butter, melted: Adds richness and moisture for a perfectly fudgy texture.
- 1 cup granulated sugar: Sweetens the cookie base and contributes to a tender bite.
- 2 large eggs: Bind all ingredients together and bring a slight fluffiness to the dough.
- 1 teaspoon vanilla extract: Adds warmth and depth to the chocolate flavor.
- 1/2 cup semisweet chocolate chips: Pockets of melty, gooey chocolate that create delightful texture bursts.
- 1/2 cup cream cheese, softened: The heart of the cheesecake layer, silky and tangy for a contrast to chocolate.
- 1/4 cup powdered sugar: Sweetens the cheesecake filling smoothly without graininess.
- 1 teaspoon lemon zest (optional): A hint of citrus brightness to lift the cheesecake’s richness.
How to Make Choco-Cheesecake Cookie Bites Recipe
Step 1: Prep Your Oven and Pans
First things first, preheat your oven to 350 degrees Fahrenheit (175 degrees Celsius) and line a baking sheet with parchment paper. This simple step ensures your cookie bites won’t stick and will bake evenly, setting the stage for flawless results.
Step 2: Whisk Together Dry Ingredients for the Cookie Base
In a bowl, combine your all-purpose flour, unsweetened cocoa powder, baking powder, and salt. This dry mix is your chocolate cookie crust waiting to happen, and whisking them together makes sure every bite has well-distributed flavor and texture.
Step 3: Mix Wet Ingredients and Combine
Next, blend the melted butter with the granulated sugar until smooth — this creamy mixture makes the cookie base beautifully tender. Beat in the eggs and vanilla extract until the batter is silky and homogeneous. Gradually add the dry ingredients and stir just until combined to avoid overmixing, which keeps your bites tender. Don’t forget to fold in those semisweet chocolate chips for melty bursts of chocolate joy!
Step 4: Prepare the Luxurious Cheesecake Filling
In a separate bowl, beat the softened cream cheese together with powdered sugar and optional lemon zest. This filling should be silky and smooth, with the zest adding a subtle zing that dances beautifully with the chocolate base.
Step 5: Assemble Layers and Create the Swirl
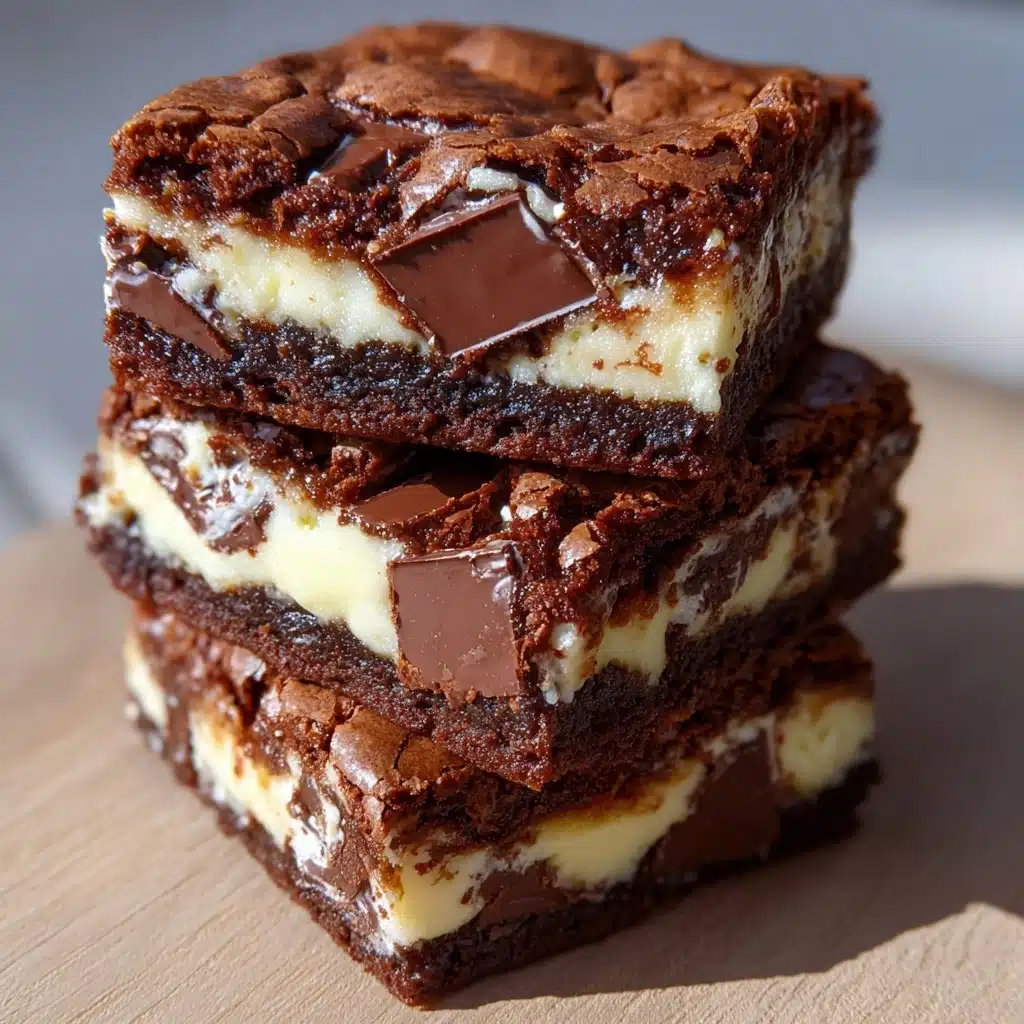
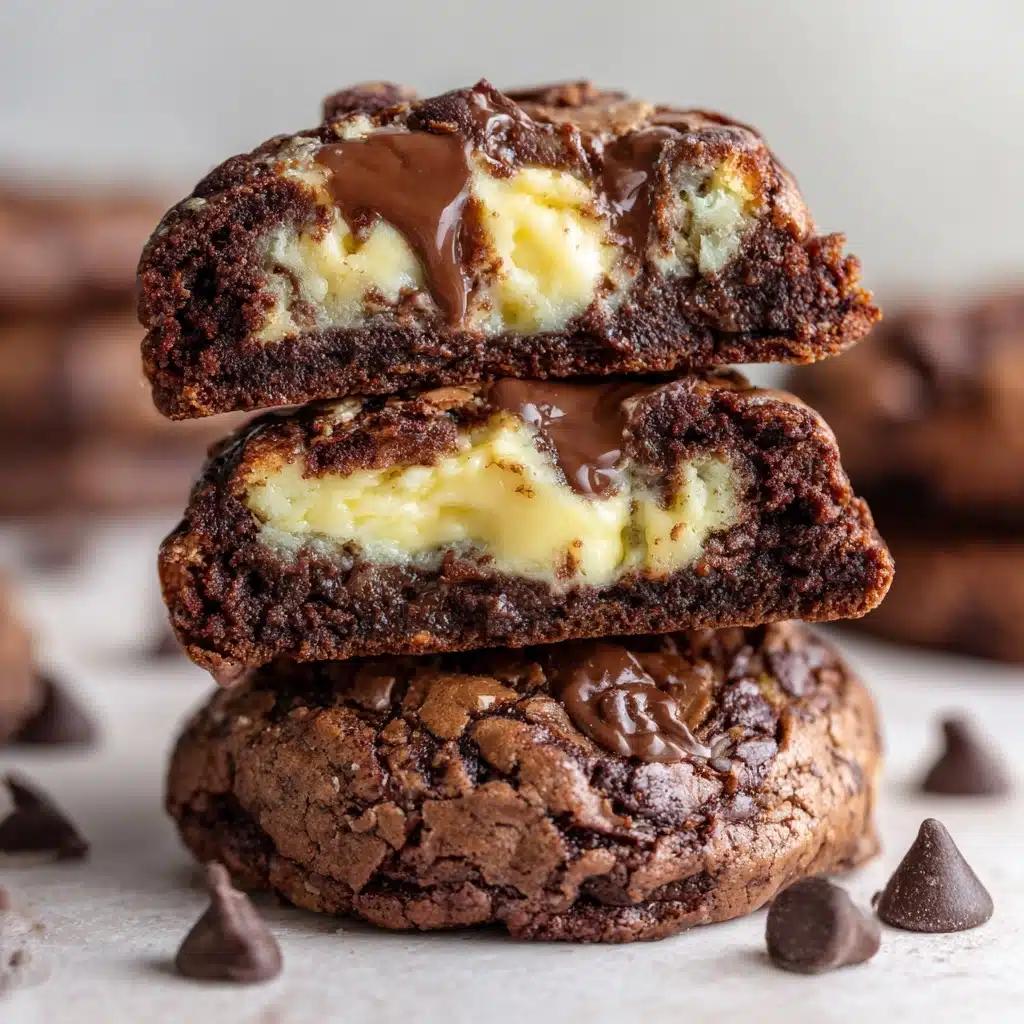
Pour about two-thirds of the brownie batter into your lined pan and spread it evenly. Drop spoonfuls of cheesecake filling on top, then gently spread to form a thin, creamy layer. Finally, dollop or drizzle the remaining brownie batter over the cheesecake layer. Using a knife or toothpick, swirl both layers together in gentle motions to create a beautiful marbled effect that looks as stunning as it tastes.
Step 6: Bake and Cool
Bake your masterpiece for 20 to 25 minutes. You want the edges to be set but the center to remain slightly soft to keep that perfect creamy cheesecake texture. Once baked, let the pan cool completely on a wire rack — patience here rewards you with the perfect cut and bite.
Step 7: Cut into Perfect Bite-Sized Squares
Using the parchment paper edges, lift the baked section from the pan. Transfer it to a cutting board and slice into small, adorable bites that are perfect for sharing or savoring alone. Each piece reveals the stunning marble swirl and invites you to indulge in a little flavor heaven.
How to Serve Choco-Cheesecake Cookie Bites Recipe
Garnishes
For a little extra flair, try dusting these bites with a light sprinkle of powdered sugar or cocoa powder. Fresh berries or a few mint leaves add a burst of color and freshness. You can also drizzle a bit of melted chocolate or caramel for an upscale touch that will wow your guests.
Side Dishes
While these bites stand brilliantly on their own, pairing them with a scoop of vanilla bean ice cream or a dollop of whipped cream elevates the dessert into a truly indulgent experience. A cup of rich coffee or smooth hot chocolate complements their flavor perfectly, making for an unforgettable treat time.
Creative Ways to Present
Bring out your inner artist and arrange these bites on a decorative platter with edible flowers or chocolate shavings. Stack them in a tiered dessert tray for a party centerpiece or pack them into cute, clear boxes for personal gifts. Their small size and elegant look make them ideal for celebrations and casual snacking alike.
Make Ahead and Storage
Storing Leftovers
Keep your Choco-Cheesecake Cookie Bites fresh by storing them in an airtight container in the refrigerator. They’ll stay delicious for up to four days, allowing you to enjoy their creamy, chocolatey goodness whenever the craving strikes.
Freezing
If you want to extend their shelf life, these bites freeze beautifully. Arrange them on a baking sheet so they don’t touch, freeze until firm, then transfer to a freezer-safe container or bag. You can keep them frozen for up to two months without sacrificing flavor or texture.
Reheating
To enjoy these bites warm, simply remove the desired number from the fridge or freezer and let them come to room temperature. If you prefer them warm, pop them in the microwave for about 10-15 seconds. This softens the cheesecake filling while keeping the chocolate layer tender and irresistible.
FAQs
Can I use low-fat cream cheese for the cheesecake filling?
Yes, you can, but keep in mind that full-fat cream cheese gives the richest, creamiest texture and best flavor balance. Using low-fat versions might yield a slightly tangier and less smooth filling.
Is it possible to make this recipe gluten-free?
Absolutely! Just swap the all-purpose flour for a good quality gluten-free flour blend that measures cup-for-cup. Your cookie bites will still come out decadent and delicious.
Can I add nuts or other mix-ins to the cookie batter?
Definitely. Chopped walnuts or pecans can add a lovely crunch and complement the chocolate and cheesecake flavors. Just fold them in with the chocolate chips before baking.
How can I tell when the cookie bites are done baking?
Look for set edges that have begun to pull away slightly from the pan and a center that’s still a little soft but no longer wet. This ensures the cheesecake layer stays creamy without being undercooked.
What’s the best way to achieve that beautiful swirl effect?
After layering the batter and cheesecake filling, use a toothpick or the tip of a knife to gently twist through both layers. Try not to over-swirl to maintain distinct marbled patterns, which look as appealing as they taste.
Final Thoughts
This Choco-Cheesecake Cookie Bites Recipe is truly a little slice of joy in every bite. It’s easy enough for a cozy afternoon treat yet elegant enough to impress friends and family. The luscious marriage of chocolate and cheesecake in every morsel will quickly have you hooked. So grab your ingredients, preheat that oven, and dive into making this fabulous recipe — your taste buds will thank you!