Chocolate Mirror Glaze Cake Recipe
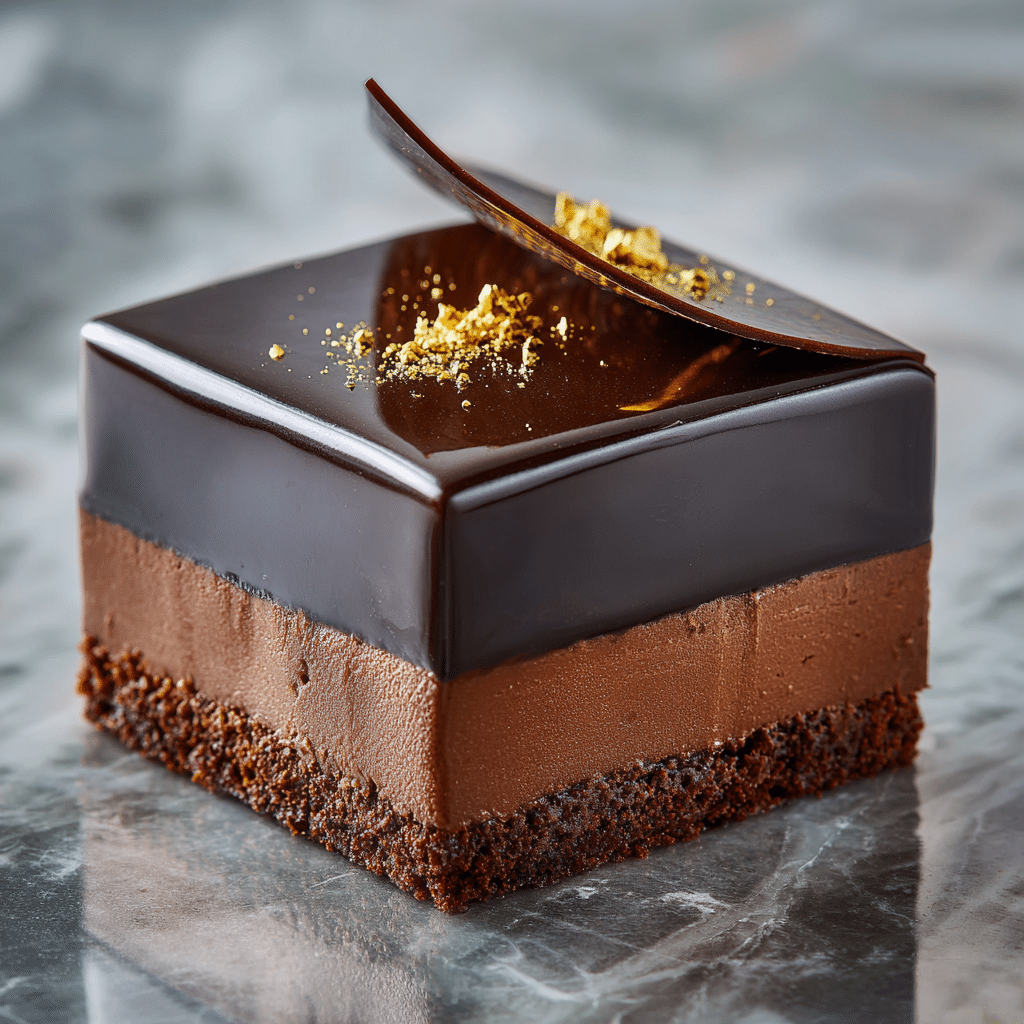
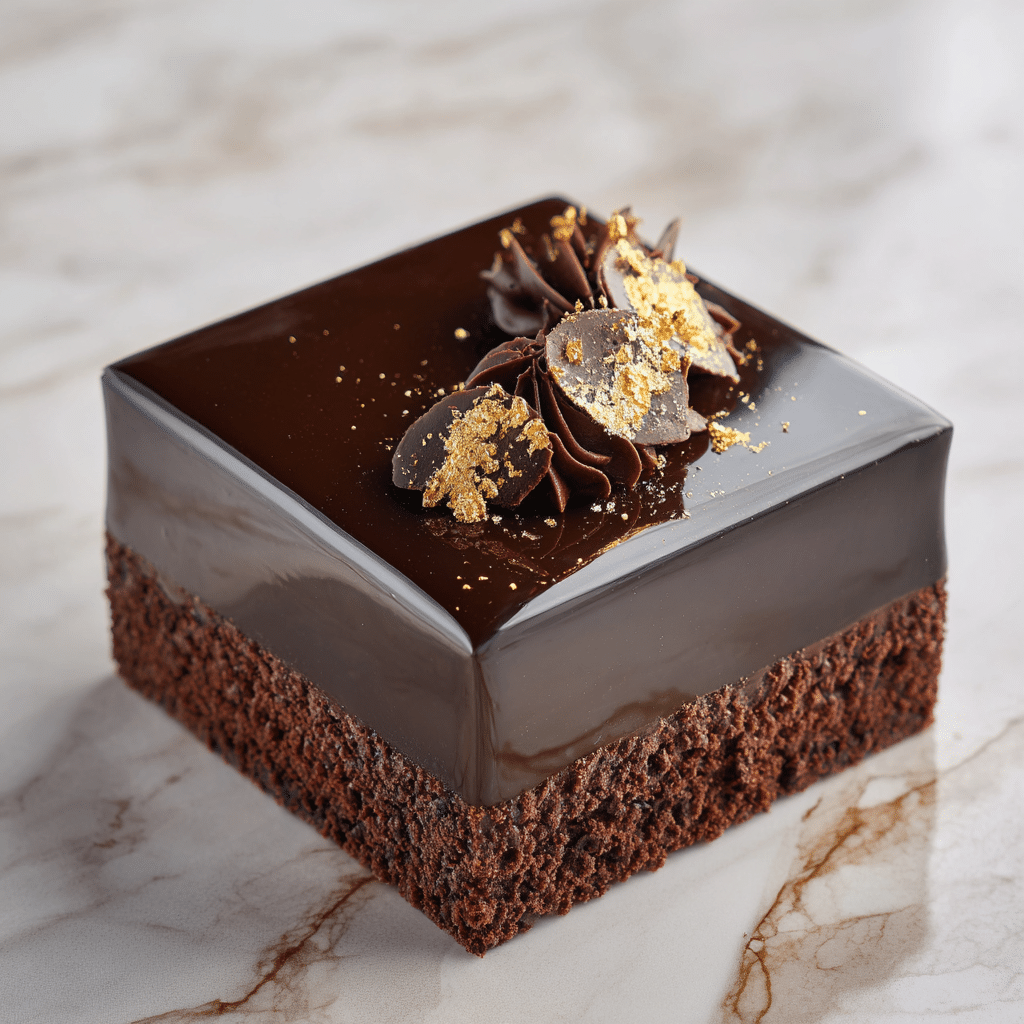
There is something truly magical about a Chocolate Mirror Glaze Cake. This dessert is more than just a cake; it’s an elegant masterpiece that dazzles the eyes with its flawless, shiny surface and delights the palate with rich layers of chocolate sponge and creamy ganache. Whether you’re celebrating a special occasion or simply craving a luxurious treat, this cake brings a show-stopping presentation combined with an irresistible taste that feels like pure love in every bite.
Ingredients You’ll Need
The beauty of this Chocolate Mirror Glaze Cake lies in its simplicity, and the ingredients are just as essential as they are straightforward. Each component plays a vital role, from the chocolate sponge that forms the foundation, to the luxurious ganache filling, and finally the glossy mirror glaze that creates that signature reflective effect.
- 2 cups chocolate sponge cake layers: Soft and airy, these layers provide the perfect structure and chocolate flavor base.
- 1 cup chocolate ganache: Smooth and creamy, it’s the luscious filling that makes every bite decadent.
- 1 cup sugar: Sweetens the glaze and balances the rich cocoa’s bitterness.
- 1/2 cup cocoa powder: Gives the glaze its deep chocolate color and bold flavor.
- 1/2 cup cream: Adds richness and smoothness, essential for that velvety texture in the glaze.
- 1 tbsp gelatin: The secret to a firm, perfectly glossy finish that holds its shape beautifully.
How to Make Chocolate Mirror Glaze Cake
Step 1: Prepare and Layer the Chocolate Sponge with Ganache
Start by arranging your chocolate sponge cake layers neatly. Spread a generous layer of the chocolate ganache between each sponge layer to bind them together and add creamy richness. This combination creates the irresistible texture contrast that makes every forkful a delight.
Step 2: Heat Sugar, Cocoa, and Cream Until Smooth
In a saucepan, combine the sugar, cocoa powder, and cream. Gently heat the mixture over medium heat, stirring constantly to melt the sugar and blend the ingredients until luxuriously smooth. This step is key to achieving the glossy texture of the mirror glaze.
Step 3: Add Bloomed Gelatin and Mix
Bloom the gelatin by sprinkling it over cold water and allowing it to soften, then stir it into the warm chocolate mixture. This ensures your glaze will set perfectly with that iconic shiny finish, creating a mirror-like surface that’s simply breathtaking.
Step 4: Pour Glaze Over Chilled Cake for Shiny Finish
Place your layered cake in the fridge to chill until firm; a cold surface is essential for the glaze to set properly. Then, carefully pour the warm mirror glaze evenly over the chilled cake, allowing it to cascade down the sides for a flawless, glossy coat that reflects the light beautifully.
Step 5: Chill Until Set
Once glazed, return the cake to the refrigerator and let it chill for at least an hour. This final step lets the glaze firm up to a perfect sheen, ready to impress your guests with every slice.
How to Serve Chocolate Mirror Glaze Cake
Garnishes
While the glaze itself shines like a jewel, garnishing your Chocolate Mirror Glaze Cake can elevate the presentation even further. Think fresh raspberries for a burst of color and tartness, edible gold leaf for that extra touch of luxury, or a sprinkle of toasted nuts to add a crunchy contrast.
Side Dishes
This cake pairs wonderfully with light accompaniments that balance its richness. Vanilla bean ice cream, a dollop of whipped cream, or a simple fresh fruit salad are all excellent choices to serve alongside. They help cleanse the palate and complement the decadent chocolate flavors perfectly.
Creative Ways to Present
Take your cake presentation up a notch by serving individual slices with a drizzle of raspberry coulis or placing a delicate chocolate curl on top. You can also serve the cake on a reflective platter to amplify its mirror glaze effect, making it the star of your dessert table.
Make Ahead and Storage
Storing Leftovers
Leftover Chocolate Mirror Glaze Cake can be stored covered in the refrigerator for up to three days. Keeping it chilled helps maintain the glaze’s striking shine and the cake’s moist texture, making it just as delightful even later.
Freezing
If you want to enjoy this cake later, you can freeze it. Wrap the cake tightly in plastic wrap and then in foil to protect the glaze. When ready to enjoy, thaw it slowly in the refrigerator overnight to preserve its luxurious texture and glossy finish.
Reheating
Since the mirror glaze is enjoyed cold, reheating is not recommended. Instead, simply allow the cake to come to room temperature for about 20 minutes before serving to enhance the flavors without compromising the beautiful glaze.
FAQs
What makes the glaze so shiny?
The shine comes from the combination of cocoa, cream, sugar, and gelatin. The gelatin helps the glaze set firmly and smooths out the surface, giving it that perfect reflective finish.
Can I use other types of cake layers?
Absolutely! While chocolate sponge is traditional and perfectly complements the glaze, you can experiment with vanilla or even red velvet layers for a unique twist.
How long does the glaze take to set?
After pouring the glaze over the chilled cake, it typically takes about an hour in the refrigerator to fully set, achieving that mirror-like finish.
Is gelatin the only setting agent I can use?
Gelatin is preferred as it creates a smooth, elastic finish. However, agar-agar can be a vegetarian substitute but may alter the texture slightly.
Can I make the glaze ahead of time?
Yes, you can prepare the glaze ahead and keep it refrigerated. Warm it gently before pouring it over the cake to restore its fluidity and perfect pouring consistency.
Final Thoughts
Making a Chocolate Mirror Glaze Cake at home might sound fancy, but once you master the steps, it becomes an incredibly rewarding process that’s sure to wow both your eyes and taste buds. This cake is perfect for celebrating life’s special moments or simply treating yourself to a slice of chocolate heaven. Go ahead, try this recipe, and bring a little sparkle to your dessert table!