Crispy Baked Chicken Tenders (Print-Friendly Version) Recipe
“`html
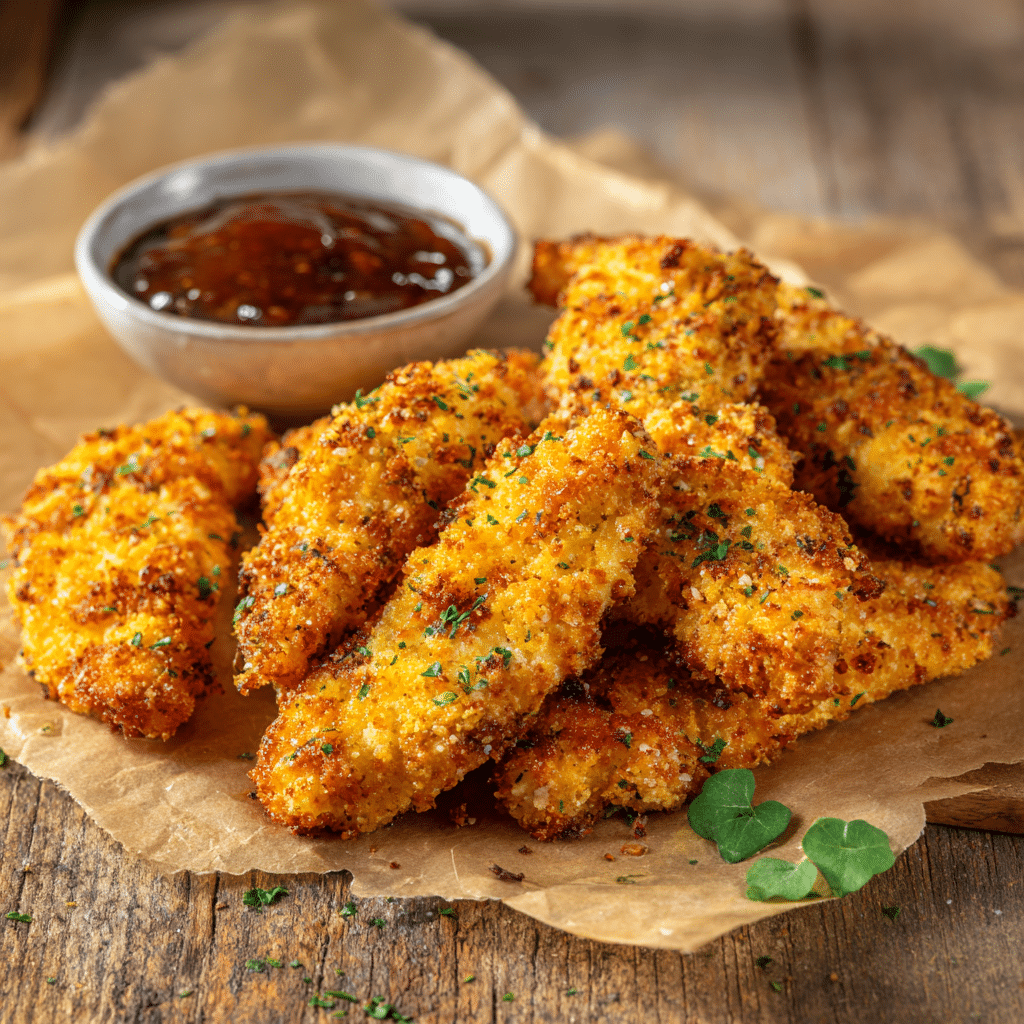
If you are craving a dish that brings together golden, perfectly crisp edges with juicy, tender chicken inside, then you are going to fall in love with this recipe for Crispy Baked Chicken Tenders (Print-Friendly Version). These tender strips of chicken are coated in a flavorful blend of panko breadcrumbs, Parmesan, and just the right amount of seasoning before being baked to crispy perfection. It’s a lighter alternative to fried chicken tenders without compromising on that addictive crunch and satisfying flavor. Trust me, once you try this recipe, it will become one of your go-to comfort foods for weeknights, snack time, or even when entertaining friends and family!

Ingredients You’ll Need
Only a handful of simple ingredients come together for this dish, but each one plays a crucial role—from building texture to layering flavor and achieving that gorgeous golden color.
- Chicken breasts or tenders: Choose fresh, boneless strips about 2.5 cm wide for tender bites that cook evenly.
- Eggs: Beaten into an egg wash, they help the coating stick and add moisture.
- Panko breadcrumbs: These provide that signature crunch and light texture you want in your chicken tenders.
- Grated Parmesan cheese (optional): Adds a subtle nuttiness and enhances the savory flavor.
- Garlic powder: Infuses the coating with comforting, aromatic warmth.
- Paprika: Gives a mild smokiness and beautiful color to the crust.
- Onion powder: Brings a subtle sweet earthiness to balance the seasonings.
- Salt: Essential for boosting all the other flavors and seasoning the meat.
- Ground black pepper: Adds just the right hint of spice to wake up your taste buds.
- Olive oil spray: Helps achieve a golden, crispy exterior during baking without excess grease.
How to Make Crispy Baked Chicken Tenders (Print-Friendly Version)
Step 1: Prep Your Chicken
Start by slicing the chicken breasts into strips about 2.5 cm wide if you haven’t bought pre-cut tenders. This ensures each piece cooks evenly and fits perfectly on your baking tray.
Step 2: Mix the Egg Wash and Seasoned Breadcrumbs
Beat your eggs in a bowl until smooth and uniform. In a separate bowl, combine panko breadcrumbs, Parmesan cheese if using, garlic powder, paprika, onion powder, salt, and black pepper. This seasoned mixture is what transforms simple chicken strips into irresistible crispy tenders.
Step 3: Season the Chicken Strips
Lightly sprinkle the chicken strips with a little salt and pepper to enhance the flavor of the meat itself before breading. This step is small but makes a big difference in taste.
Step 4: Coat the Chicken
Dip each strip into the egg wash, letting any excess drip off. Then press the strip firmly into the breadcrumb mixture so it gets a thorough coating. For an extra crunchy crunch, feel free to double coat by repeating the egg and breadcrumb steps. The double layer creates a gratifyingly crispy exterior every time.
Step 5: Prepare for Baking
Line a baking sheet with parchment paper or a silicone mat for easy cleanup. If available, place a wire rack on top—it’s a game changer for crispiness since it lets hot air circulate underneath the chicken. Arrange the coated chicken strips on the rack or directly on the tray, spacing them apart to encourage even cooking.
Step 6: Bake to Golden Perfection
Preheat your oven to 200°C. Lightly spritz the chicken tenders with olive oil spray. This step helps achieve a golden hue without deep frying. Bake for 20 to 25 minutes, turning the tenders halfway through baking, until they are shimmering golden and crisp all over. Make sure the internal temperature reaches 74°C for safety—juicy, cooked-through chicken never tasted so good through a crispy crust.
Step 7: Rest & Enjoy!
Take the tenders out of the oven and let them rest a few minutes. This brief cooldown lets the juices redistribute and keeps the meat luscious. Serve with your favorite dipping sauces and prepare to delight in every crispy bite.
How to Serve Crispy Baked Chicken Tenders (Print-Friendly Version)
Garnishes
A sprinkle of fresh chopped parsley or a dusting of finely grated Parmesan right after baking adds a fresh, vibrant touch. A little squeeze of lemon also brightens the rich flavors wonderfully.
Side Dishes
Pair your crispy baked chicken tenders with a range of colorful sides like creamy coleslaw, roasted sweet potato wedges, or a crisp garden salad. For something warm and comforting, mashed potatoes or mac and cheese create a winning combo.
Creative Ways to Present
For a fun twist, serve these tenders as part of a “build-your-own” chicken tender bar with various sauces, pickles, and mini buns. Kids and adults alike will enjoy customizing their own perfect bites!
Make Ahead and Storage
Storing Leftovers
Keep any leftover tenders in an airtight container in the refrigerator for up to 3 days. This recipe reheats beautifully, so no need to waste a single crunch-packed tender.
Freezing
To enjoy later, freeze uncooked breaded tenders on a tray lined with parchment paper, then transfer to a freezer-safe bag after they’re firm. They can stay in the freezer for up to 2 months. When ready, bake directly from frozen, adding a few extra minutes to the cooking time.
Reheating
Reheat leftover tenders in a preheated oven at 180°C for about 10 minutes or until warmed through and crispy. Avoid microwaving to keep that coveted crunch intact.
FAQs
Can I use regular breadcrumbs instead of panko?
Absolutely! While panko breadcrumbs create a lighter, crispier crust, regular breadcrumbs will still give you delicious results—just expect a slightly denser coating.
Is it necessary to use Parmesan cheese in the breading?
Parmesan cheese is optional but highly recommended for an extra depth of savory flavor and wonderful nutty notes that elevate the tenders.
How can I make the tenders extra crispy?
Using a wire rack to bake the tenders allows air to circulate around them, enhancing crispness. Double coating by dipping twice in egg and breadcrumbs also delivers a crunchier texture.
Can I prepare these tenders ahead of time?
Yes! You can bread the chicken tenders and store them in the fridge for a few hours before baking, or freeze them uncooked to bake fresh later.
What dipping sauces pair best with these chicken tenders?
Classic favorites like honey mustard, barbecue sauce, ranch, or even a spicy sriracha mayo make perfect partners to these crispy baked delights.
Final Thoughts
There’s something incredibly satisfying about biting into perfectly golden, crispy chicken tenders that are baked rather than fried. This Crispy Baked Chicken Tenders (Print-Friendly Version) recipe is proof that you don’t need tons of complicated ingredients or messy frying to enjoy a deliciously crunchy and tender chicken treat. It’s simple, wholesome, and deeply comforting—making it an ideal choice for busy weeknights, family meals, or casual get-togethers. I wholeheartedly encourage you to try it soon and discover how effortlessly amazing homemade chicken tenders can be!
“`