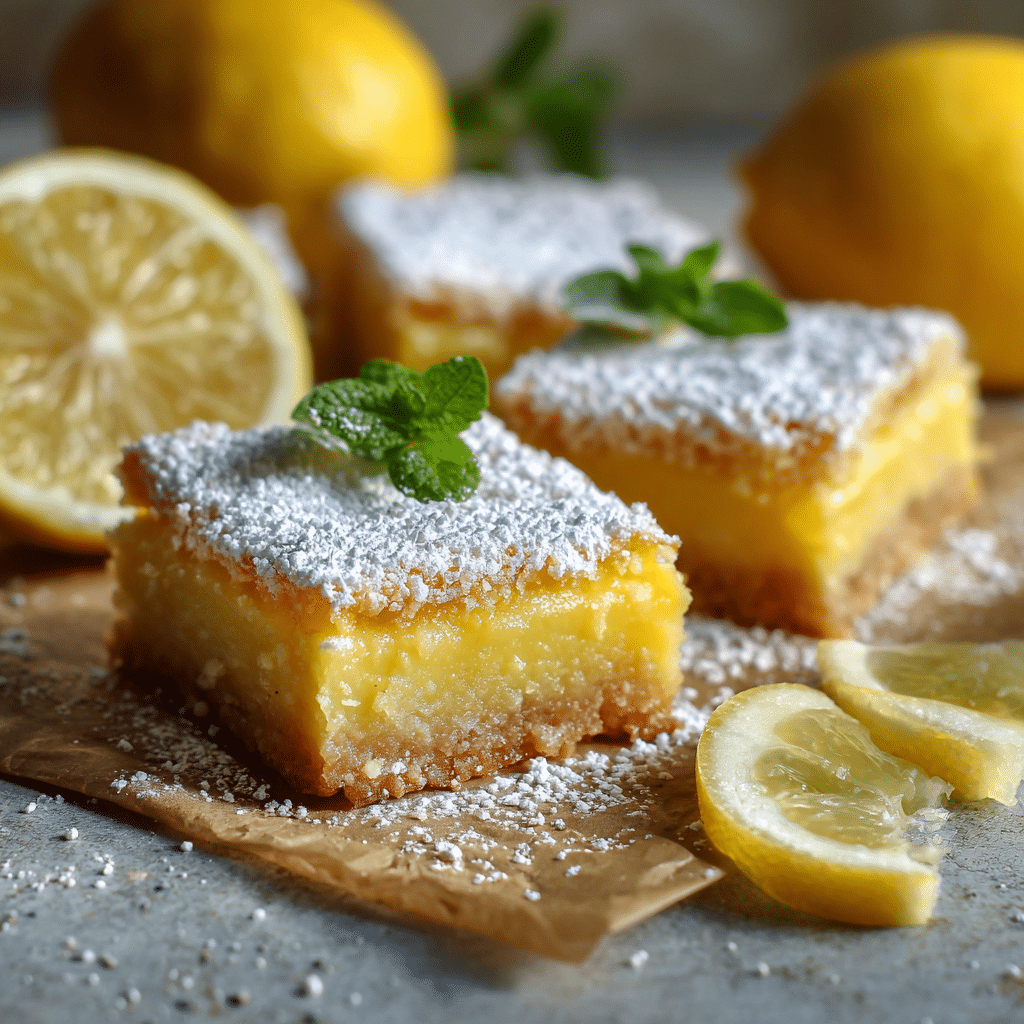
“Lemon Bars Recipe
If you are searching for a bright and irresistible treat, these Lemon Bars are sure to become your new favorite. Picture a buttery shortbread crust that melts in your mouth, topped with a tangy lemon curd layer bursting with fresh citrus flavor. The balance of sweet and tart in these bars is pure magic, making them the perfect dessert to brighten any day. Whether you serve them at a gathering or enjoy a quiet moment with a cup of tea, these Lemon Bars bring sunshine to every bite.

Ingredients You’ll Need
Making these Lemon Bars requires just a handful of simple ingredients, each playing a crucial role in delivering that delightful texture and zesty flavor. The combination of basic pantry staples with fresh lemon juice and zest is what turns this dessert from ordinary to spectacular.
- 1 cup flour: Provides the sturdy base for the buttery crust that supports the lemon filling perfectly.
- 1/4 cup sugar: Adds just enough sweetness to the crust without overpowering the tart lemon.
- 1/2 cup butter: Brings richness and creates a tender, melt-in-your-mouth shortbread layer.
- 3 eggs: Bind the lemon layer while giving it a light, custardy texture.
- 1 cup sugar: Sweetens the lemon curd to balance the sour notes beautifully.
- 1/3 cup lemon juice: Packs a punch of fresh citrus to give the filling that signature tang.
- 2 tbsp lemon zest: Boosts the lemon flavor and adds a lovely aroma.
How to Make “Lemon Bars”
Step 1: Prepare and Bake the Crust
Start by combining the flour, sugar, and butter (softened is best) to form a crumbly dough. Press this mixture evenly into your baking dish to ensure a uniform crust. Baking it at 350°F (175°C) for 15 minutes sets a deliciously firm and golden base that will hold your luscious lemon topping without sogginess.
Step 2: Mix the Lemon Filling
While the crust bakes, whisk together the eggs, sugar, lemon juice, and lemon zest. This mixture will create the bright, velvety curd that gives Lemon Bars their iconic zing and smooth texture. Make sure to blend thoroughly so the filling is silky and well combined.
Step 3: Bake the Layered Bars
Pour the lemon mixture over the warm crust and return to the oven for 20 more minutes. During this time, the filling sets perfectly, developing that nice balance of tart and sweet. The bars will have a slight jiggle when they come out but will firm up as they cool.
Step 4: Cool and Finish with Powdered Sugar
Once baked, let the Lemon Bars cool completely to room temperature. This resting period helps the texture firm up for clean slices. Dust the top generously with powdered sugar for a sweet touch and a pretty presentation that screams homemade goodness.
How to Serve “Lemon Bars”
Garnishes
Lemon Bars are stunning on their own, but a few simple garnishes can transform them into show-stopping treats. Consider adding a sprinkle of extra lemon zest on top or a light drizzle of honey. Fresh mint leaves add a pop of color and a refreshing complement to the citrusy sweetness.
Side Dishes
These bars pair wonderfully with a cup of hot tea or coffee, making them ideal for afternoon snacks or dessert. You might also serve them alongside light, fruity salads or a scoop of vanilla ice cream to create a delightful contrast of temperatures and flavors.
Creative Ways to Present
For a festive touch, try cutting the bars into bite-sized squares and placing them on a decorative platter dusted with powdered sugar. Wrapping individual bars in parchment paper tied with a ribbon makes a charming homemade gift. You can even layer them with whipped cream and fresh berries in small glasses for an elegant parfait twist.
Make Ahead and Storage
Storing Leftovers
Once baked, these Lemon Bars can be stored in an airtight container in the refrigerator for up to three days. Keeping them chilled helps maintain their firmness and fresh lemon flavor, so pull them out shortly before serving for the best experience.
Freezing
If you want to make Lemon Bars in advance, you can freeze them after baking and cooling. Wrap each bar tightly in plastic wrap, then place them in a freezer-safe container or bag. They will keep well for up to two months. Thaw in the refrigerator overnight before enjoying.
Reheating
Lemon Bars are best enjoyed chilled or at room temperature, so reheating is usually unnecessary. However, if you prefer a slightly warmed treat, place a bar in a low oven (about 300°F or 150°C) for 5 to 8 minutes to soften slightly without melting the powdered sugar topping.
FAQs
Can I use bottled lemon juice instead of fresh?
While fresh lemon juice provides the brightest, freshest flavor in Lemon Bars, bottled lemon juice can be used in a pinch. Just keep in mind that the taste might be a bit less vibrant, so consider adding a touch more zest to boost the citrus notes.
How do I get clean slices when cutting Lemon Bars?
For neat slices, chill the bars completely and use a sharp knife. Wiping the knife clean between cuts will prevent crumbs or filling from sticking and ensure each piece looks beautiful.
Can I make these bars gluten-free?
Yes! Swap out the all-purpose flour for a gluten-free flour blend designed for baking. The texture might be slightly different, but the lemon flavor and overall experience will still be delightful.
What if I want a less sweet lemon filling?
Feel free to reduce the sugar slightly in the lemon mixture to suit your taste. Lemon Bars are all about balancing tart and sweet, so adjusting the sugar allows you to tailor them perfectly for your preference.
Is there a way to make these without eggs?
You can try using an egg substitute like a flax egg or store-bought egg replacer, but keep in mind that the texture will differ. Eggs help set the lemon filling, so the bars may be less firm without them.
Final Thoughts
These Lemon Bars are a true delight that brings joy with every bite. The harmony of tart citrus and buttery shortbread is just unbeatable. Once you try this recipe, I have no doubt you’ll be reaching for it again and again to brighten your dessert table and your day. Go ahead, treat yourself to a little sunshine in bar form — you won’t regret it!