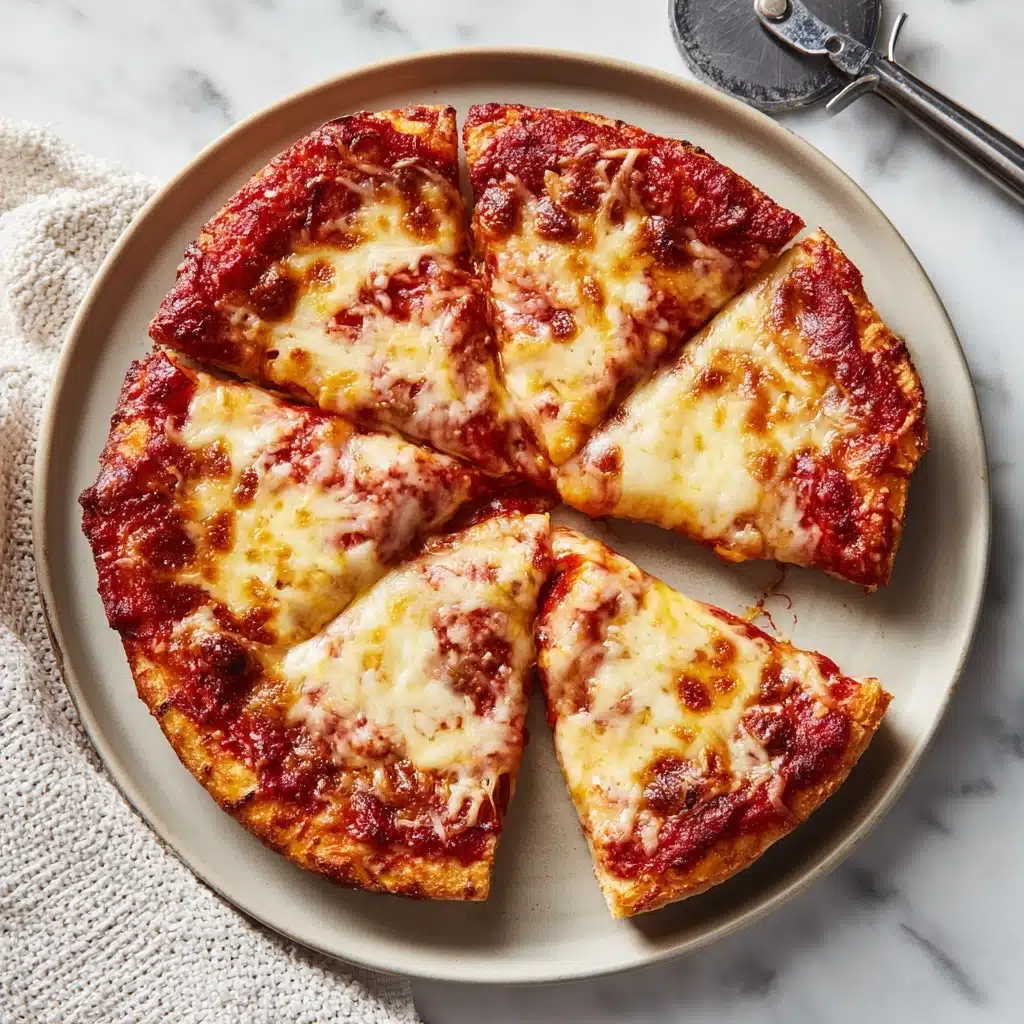
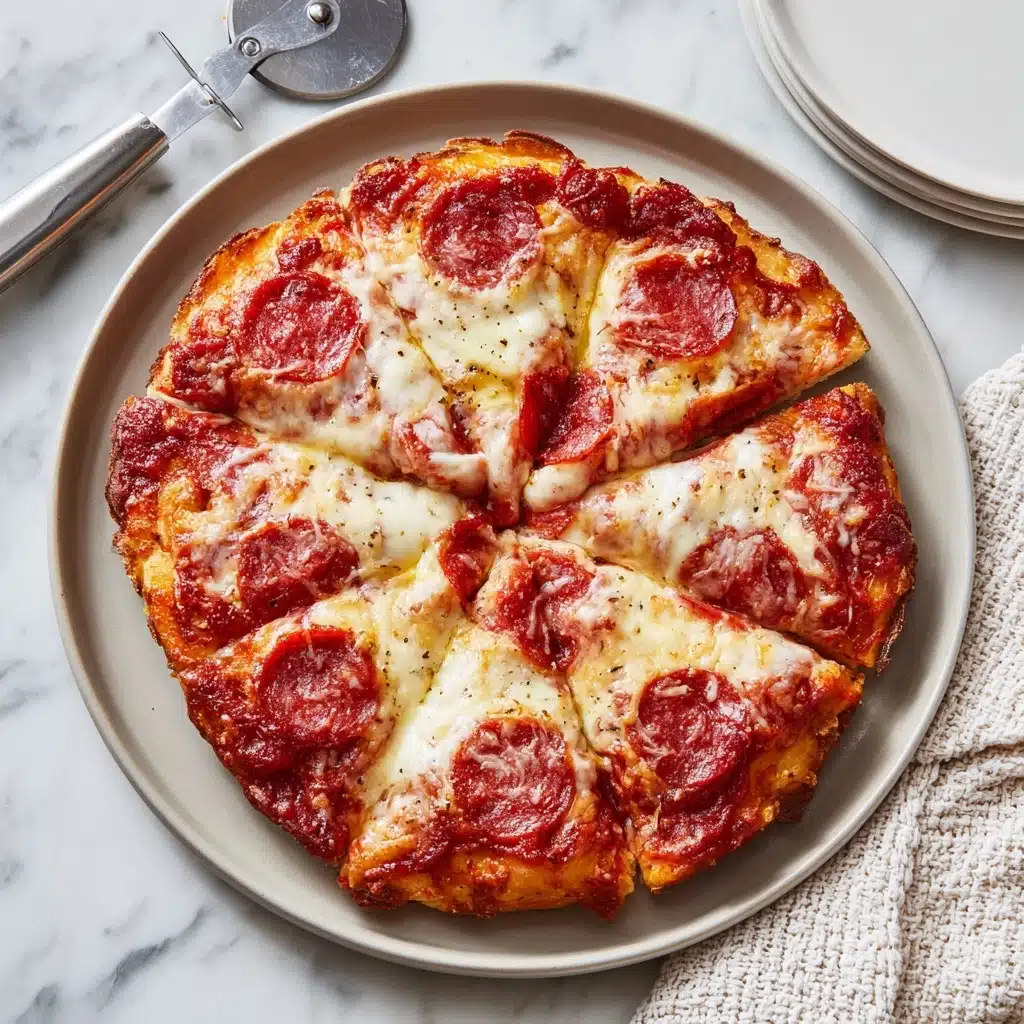
Pizza Eggs Recipe
There is something truly irresistible about Pizza Eggs, a delightful dish that brings together the creamy richness of eggs and the comforting, melty flavors of pizza in one beautiful, high-protein, low-carb package. Whether you’re craving a speedy breakfast upgrade or a flavorful lunch that keeps you satisfied and energized, Pizza Eggs delivers that perfect balance of savoury goodness and simple preparation that feels both indulgent and wholesome. This recipe transforms everyday ingredients into a vibrant, fun meal that feels like a warm hug on a plate.
Ingredients You’ll Need
Gathering just a handful of essential ingredients, this recipe showcases how each component plays a vital role in crafting those irresistible Pizza Eggs. From the gooey melted cheese that forms the crispy base to the punchy salami and fresh herbs that add layers of flavour, every ingredient adds something special.
- 3 eggs: The rich, protein-packed foundation that makes this dish hearty and nourishing.
- 60g (approx. 2 oz) reduced-fat cheese, grated: Melts beautifully to create a crispy, golden base and a gooey topping.
- 1 tbsp passata (about 15g): Brings that classic tomatoey tang that ties the pizza flavors together.
- A few slices of salami (approx. 20g): Adds a spicy, savory pop that elevates the dish beyond ordinary eggs.
- Mixed herbs, to top: Freshens and brightens with a fragrant finishing touch.
How to Make Pizza Eggs
Step 1: Melt the Cheese Base
Start by heating a non-stick frying pan over medium heat and sprinkle half of your grated cheese evenly across the surface. Allow it to melt gently and cook just until it starts to crisp slightly, creating a golden, savory crust that will hold the eggs perfectly.
Step 2: Whisk the Eggs
While the cheese is doing its magic, crack your eggs into a bowl and whisk them until smooth and well combined. This ensures your eggs cook evenly and have that lovely fluffy texture you want in your Pizza Eggs.
Step 3: Cook the Eggs Over the Cheese
Pour the whisked eggs gently over the melted cheese layer. Immediately cover the pan with a lid to trap the heat, helping the eggs cook evenly and the bottom to set firm and golden without burning.
Step 4: Flip the Egg-Cheese Base
Once the eggs have set on the bottom and the edges look cooked through, carefully slide a spatula under the base and flip it over. This step locks in all the flavors and gives that wonderful crisp texture both sides.
Step 5: Add Toppings and Melt
Spread the tomato passata on the cooked side, then layer on the slices of salami and scatter the remaining grated cheese over the top. Cover the pan again until the cheese melts into a bubbling, savory blanket and the salami warms through.
Step 6: Serve Immediately
Slide your Pizza Eggs onto a plate, sprinkle generously with mixed herbs, and dive straight in for a warm, cheesy delight that feels like a cozy pizza in egg form.
How to Serve Pizza Eggs
Garnishes
Sprinkling fresh mixed herbs such as oregano, basil, or parsley adds a burst of color and a fresh aromatic flavor that contrasts beautifully with the rich, cheesy base of Pizza Eggs. You can also add a pinch of chili flakes if you like a bit of heat or some freshly cracked black pepper for an extra kick.
Side Dishes
While Pizza Eggs are tasty and filling on their own, pairing them with a fresh green salad or some lightly sautéed spinach helps balance the richness and adds a refreshing crunch. For a heartier meal, whole grain toast or roasted vegetables are great companions.
Creative Ways to Present
For a fun twist, serve Pizza Eggs in individual small skillets for an impressive brunch presentation. You might also cut them into wedges like a frittata and serve as finger food at gatherings. Adding colorful bell pepper slices or olives on top before melting the cheese can introduce extra pizzazz and flavor layers.
Make Ahead and Storage
Storing Leftovers
If you have any Pizza Eggs left over, let them cool to room temperature before transferring to an airtight container. They will keep well in the refrigerator for up to 2 days without losing much of their flavor or texture.
Freezing
Freezing Pizza Eggs is possible, but it’s best to do it without the fresh herbs and passata topping to avoid sogginess. Place portions in a freezer-safe container or wrap tightly in foil, and freeze for up to a month. Thaw overnight in the fridge before reheating.
Reheating
To reheat your Pizza Eggs, gently warm them in a non-stick pan over low heat to revive the crispy cheese base and melt the cheese topping again. Avoid microwaving if you want to keep the texture crisp rather than rubbery or soggy.
FAQs
Can I use other types of cheese for Pizza Eggs?
Absolutely! While reduced-fat cheese melts nicely and keeps the dish lighter, mozzarella, cheddar, or even a spicy pepper jack work wonderfully and add their own unique flavors.
What if I don’t eat salami? What alternatives are there?
You can swap out salami for other toppings like cooked bacon, ham, diced bell peppers, or even sautéed mushrooms to keep that rich, savory twist in your Pizza Eggs.
Is this recipe suitable for a quick breakfast?
Yes! Pizza Eggs take just about 12 minutes from start to finish, making them a fantastic, quick breakfast or brunch option that feels special without any fuss.
Can I make Pizza Eggs vegan or dairy-free?
While this recipe relies on cheese and eggs, you could experiment with plant-based cheese and chickpea flour or tofu-based egg substitutes, though the texture will be different—still tasty in their own right.
How important is the passata in the recipe?
Passata adds the classic tomato flavor that ties the pizza theme together, but if you don’t have it on hand, a spoonful of tomato sauce or even fresh diced tomatoes can work to keep that brightness.
Final Thoughts
Pizza Eggs are the kind of comforting yet clever dish that you’ll find yourself making over and over once you try them. They elevate simple ingredients into a warm, cheesy, satisfying meal that feels both nostalgic and fresh. So next time you want to shake up your breakfast or lunch routine, give Pizza Eggs a go—your taste buds will thank you!