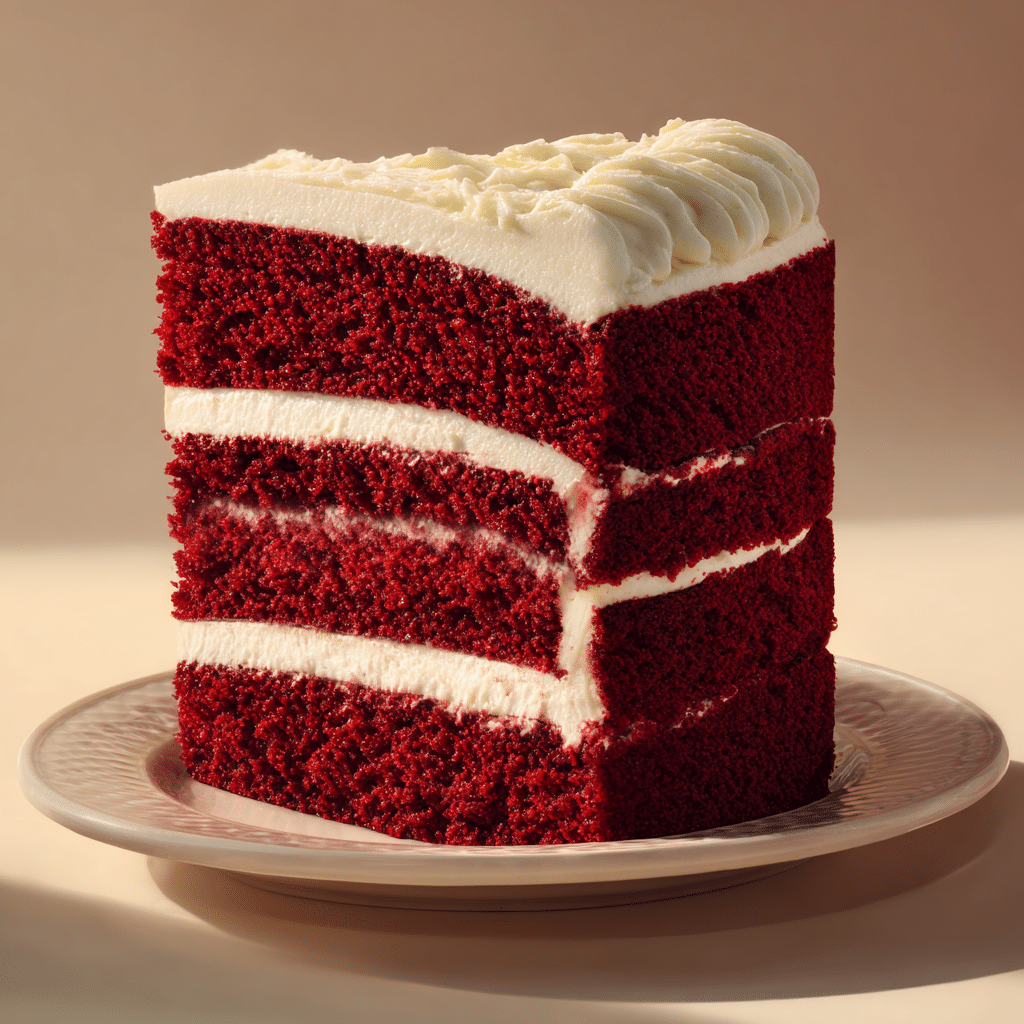
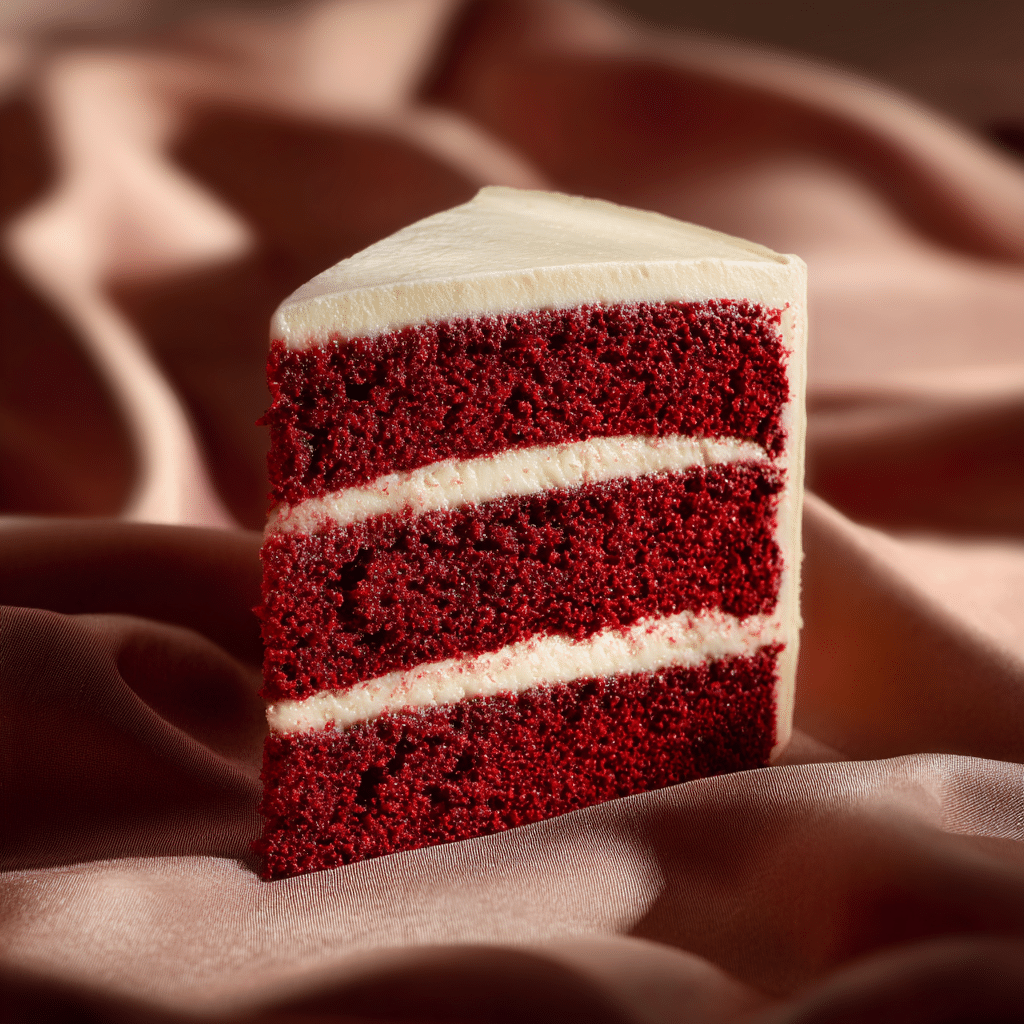
Red Velvet Cake Recipe
If you have a soft spot for desserts that bring a perfect balance of flavor, texture, and eye-catching color, then this Red Velvet Cake is just what your kitchen needs. This cake stands out with its velvety smooth texture and that iconic, vibrant red hue that makes every bite feel like a little celebration. The beauty of Red Velvet Cake lies not only in its striking appearance but also in the tender crumb and subtle cocoa flavor that make it utterly irresistible. Whether you’re baking it for a special occasion or just to treat yourself, this classic cake never fails to impress.
Ingredients You’ll Need
Getting this Red Velvet Cake just right is all about the essentials. Each ingredient plays a crucial role in creating the tender crumb, gentle cocoa undertones, and that vivid red color that makes the cake so memorable.
- Flour: Provides the sturdy yet soft foundation for the cake’s delicate texture.
- Cocoa: Adds a subtle chocolate flavor that complements the sweetness and enhances the richness.
- Sugar: Sweetens the cake while contributing to a moist, tender crumb.
- Eggs: Bind the ingredients together and add structure for a smooth cake texture.
- Food coloring: The secret to that signature red hue that makes Red Velvet Cake instantly recognizable and festive.
How to Make Red Velvet Cake
Step 1: Prepare the Batter
Start by mixing your flour, cocoa, and sugar carefully to combine the dry ingredients evenly. Then incorporate the eggs to help the batter bind together, creating that soft, smooth consistency that every great Red Velvet Cake needs. Taking your time with this step ensures the cake will bake into a tender, beautiful crumb.
Step 2: Add the Food Coloring
Once your batter is smooth and well-mixed, it’s time to add the food coloring. This is where the magic truly happens. A generous amount of red coloring creates the signature look that turns a simple cake into a showstopper. Be sure to blend the coloring thoroughly so the hue is consistent throughout, giving the cake its classic, rich red appearance.
Step 3: Bake and Cool
Pour your vibrant batter into a prepared cake pan and pop it into the oven. Baking times can vary, but the cake is done when a toothpick inserted in the center comes out clean. Cooling is just as important — it helps the cake set and keeps the texture perfectly tender, ready for frosting or eating as is.
How to Serve Red Velvet Cake
Garnishes
Red Velvet Cake shines brightly on its own, but the right garnishes can elevate it even further. Classic cream cheese frosting adds a tangy richness that pairs beautifully with the cake’s subtle cocoa flavor. For a little extra flair, sprinkle chopped nuts or a dusting of cocoa powder on top to add contrast and texture.
Side Dishes
When serving Red Velvet Cake, consider pairing it with fresh berries or a scoop of vanilla ice cream. The light acidity of the berries balances the sweetness of the cake, while creamy ice cream offers a cool companion that enhances every bite. Warm beverages like coffee or tea also make fantastic partners for this dessert.
Creative Ways to Present
Beyond the classic layered cake, you can get creative with your presentation. Try turning the Red Velvet Cake into cupcakes topped with swirls of cream cheese frosting, or make beautiful mini cake stacks for a punchy, individual dessert. Even crumbling it over a milkshake can make for a fun, unexpected treat that celebrates the cake’s signature flavor.
Make Ahead and Storage
Storing Leftovers
If you happen to have leftovers from your Red Velvet Cake baking adventure, don’t worry — it keeps wonderfully. Store the cake in an airtight container at room temperature for up to two days, or refrigerate it to keep it fresh for up to five days. Keeping it properly covered prevents it from drying out and preserves that soft, tender crumb you love.
Freezing
Freezing Red Velvet Cake is a great option if you want to savor it later or prepare in advance for an event. Wrap the cooled cake tightly in plastic wrap and then a layer of aluminum foil before placing it in the freezer. It will keep well for up to three months and can be thawed overnight in the fridge when you’re ready to indulge.
Reheating
When it’s time to enjoy your leftovers, gently warming slices of Red Velvet Cake can bring back the freshly baked feel. A quick zap in the microwave for 10 to 15 seconds or warming in a low oven with foil over the top will refresh the cake’s softness without drying it out. Just be careful to avoid overdoing it — you want tender, not tough!
FAQs
What makes Red Velvet Cake different from chocolate cake?
Red Velvet Cake has a more subtle cocoa flavor than traditional chocolate cake and is known for its distinctive red color and tender, velvety texture. The combination of cocoa, vinegar, and buttermilk or acidic components creates a unique flavor profile and softness.
Can I make Red Velvet Cake without food coloring?
Yes, but the signature red hue won’t be as vibrant. Some bakers opt for natural alternatives like beet juice for coloring. The flavor will stay mostly the same, but the visual impact might be less dramatic.
What frosting pairs best with Red Velvet Cake?
Cream cheese frosting is the classic and most popular choice, thanks to its tangy and creamy nature that complements the subtle cocoa and sweetness of the cake beautifully.
Is it better to use fresh or boxed ingredients for Red Velvet Cake?
Using fresh, quality ingredients always enhances the final product, but you can make a delicious Red Velvet Cake with good-quality boxed ingredients too. Fresh eggs and pure cocoa powder definitely make a positive difference in flavor and texture.
How long does Red Velvet Cake last after baking?
At room temperature, the cake stays fresh for about two days, and refrigerated, it can last up to five days when wrapped properly to maintain moisture.
Final Thoughts
This Red Velvet Cake recipe is a delightful way to brighten up any day, whether you’re celebrating a special moment or simply craving something cozy and sweet. Its soft texture, rich color, and gentle flavor make it a true crowd-pleaser, inviting you to bake it again and again. I encourage you to dive into making this classic dessert — once you do, it will surely become one of your all-time favorites too!