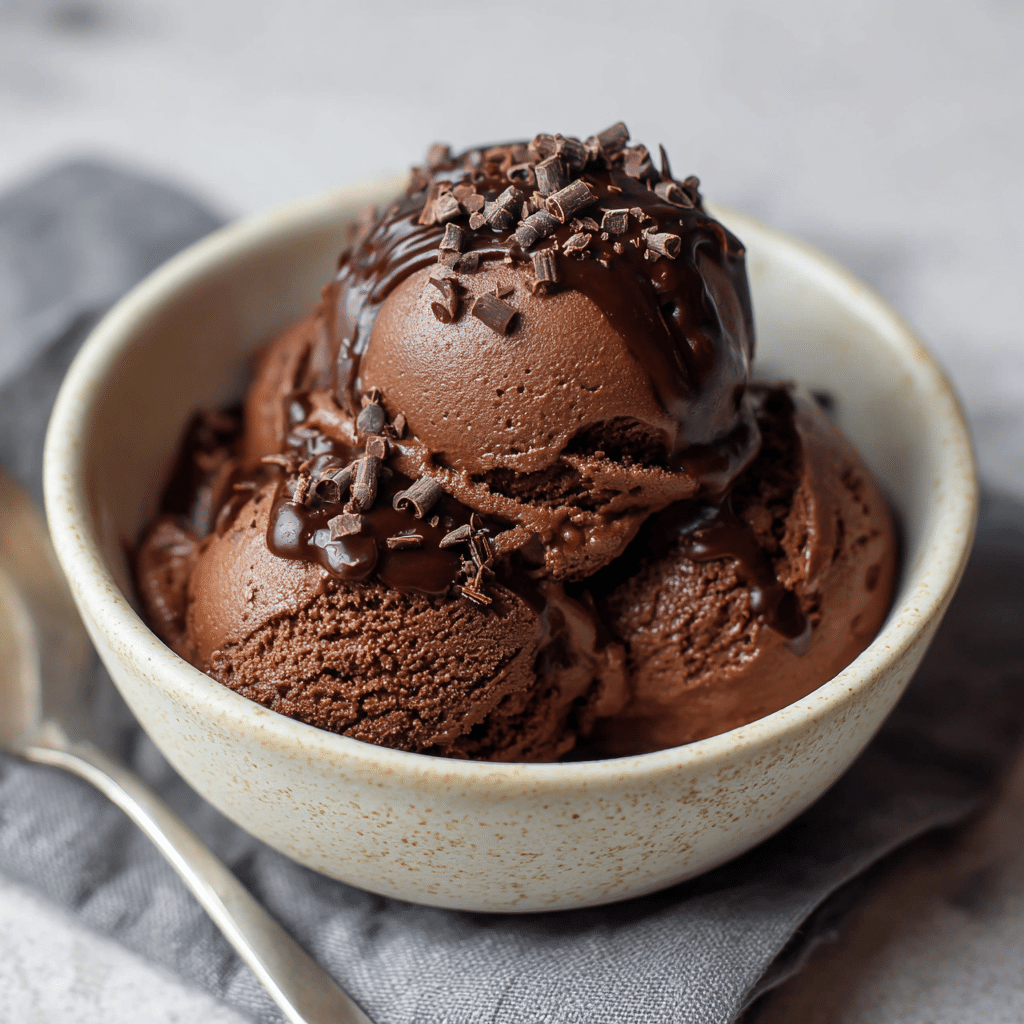
Vegan Chocolate Ice-Cream (No Churn) Recipe
If you have a sweet tooth and a love for creamy indulgences without all the fuss of complicated machinery, this Vegan Chocolate Ice-Cream (No Churn) is about to become your new best friend. With just three simple ingredients, you get a luscious, dairy-free treat that feels rich and decadently chocolatey, perfect for cooling down on warm days or anytime you crave that smooth, velvety texture of classic ice cream. Its no-churn nature means anyone can whip it up quickly, making it ideal for last-minute dessert cravings or special occasions shared with friends and family.
Ingredients You’ll Need
The beauty of this recipe is that it relies on just a handful of ingredients, but each one plays a crucial role. The dairy-free double cream brings the fluffy, creamy base, while the vegan condensed milk adds sweetness and that irresistible smoothness. Finally, the cocoa powder infuses everything with rich, deep chocolate flavor without overpowering the delicate textures.
- Dairy-free double cream (425g): This creamy base is essential for the rich, smooth texture; coconut-based creams work wonderfully.
- Vegan condensed milk (320g): Adds natural sweetness and helps achieve the perfect creamy consistency without dairy.
- Cocoa powder (40g): The star for deep chocolate flavor; use unsweetened for pure chocolaty richness.
- Vegan chocolate fudge sauce (optional): Great for drizzling and adding a luscious, gooey texture swirl.
- Dairy-free chocolate chips (optional): Add a delightful burst of melted chocolate pockets inside your ice cream.
- Ice-cream cones: Use gluten-free cones if you prefer a gluten-free option for serving.
How to Make Vegan Chocolate Ice-Cream (No Churn)
Step 1: Whisk Your Base Ingredients Together
Start by pouring your dairy-free double cream, vegan condensed milk, and cocoa powder into a large mixing bowl. Whether you have a stand mixer with a balloon whisk attachment or you’re going old-school with a hand whisk, whisk vigorously until the mixture is smooth and fully blended. This step is where the magic begins—watch as the ingredients come together into a thick, luscious chocolate cream that promises the perfect ice cream texture.
Step 2: Transfer to a Freezer-Safe Container
Once your mixture is beautifully combined, spoon it carefully into a freezer-safe tin or container. This step sets the stage for the chilling process and preserves all your hard work in one place. Make sure to spread it evenly for consistent freezing.
Step 3: Add Optional Extras
For an extra indulgent touch, drizzle some vegan chocolate fudge sauce onto the surface and sprinkle with dairy-free chocolate chips. Use a spoon to gently swirl these in, creating pockets of gooey and crunchy texture that will surprise your taste buds with every bite.
Step 4: Freeze Until Firm
Cover the container securely and pop it into the freezer. The no-churn aspect means you don’t have to mess with ice cream machines—just patience. Leave it to freeze for about six hours or preferably overnight to get that perfect scoopable consistency.
How to Serve Vegan Chocolate Ice-Cream (No Churn)
Garnishes
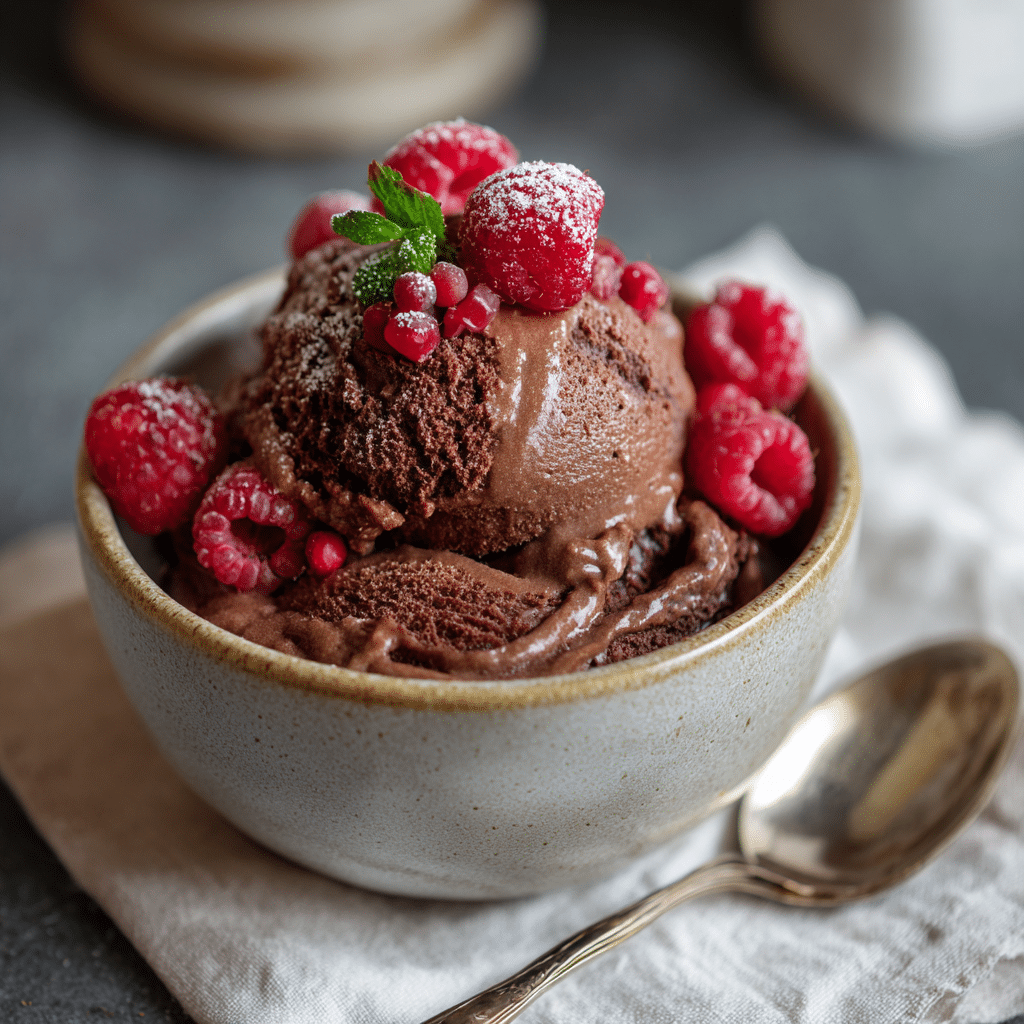
When serving your Vegan Chocolate Ice-Cream (No Churn), the right garnish can elevate it from delicious to unforgettable. Consider topping with shredded coconut, fresh berries, or a sprinkle of crushed nuts for a lovely contrast in texture and brightness. A drizzle of extra vegan chocolate fudge sauce can amp up the decadence even more.
Side Dishes
This ice cream pairs wonderfully with freshly baked vegan cookies or warm fruit crumbles. The contrast between warm and cold creates a dynamic eating experience that makes each bite interesting. For a fresh note, serve alongside sliced tropical fruits like mango or kiwi to balance the richness.
Creative Ways to Present
For a fun twist, serve your ice cream in gluten-free cones or even hollowed-out dark chocolate cups for a double chocolate punch. Another creative idea is layering the ice cream in parfait glasses with vegan brownie chunks and raspberry sauce for a show-stopping dessert that looks as good as it tastes.
Make Ahead and Storage
Storing Leftovers
If you happen to have leftovers (though that’s rare!), make sure to keep your Vegan Chocolate Ice-Cream (No Churn) tightly wrapped or covered in the freezer to prevent ice crystals from forming. For best texture, store in an airtight container and enjoy within one week for optimal creaminess and flavor.
Freezing
This ice cream freezes beautifully and requires no special preparation before freezing thanks to the no-churn method. Just ensure your container is tightly covered to avoid any freezer odors seeping in. To scoop nicely, allow the ice cream to thaw at room temperature for about 10-15 minutes before serving.
Reheating
Since this is an ice cream, reheating isn’t recommended. Instead, keep it in the freezer and simply let it soften a bit at room temperature when you’re ready to indulge. This makes scooping easier and keeps the creamy texture intact.
FAQs
What does no churn mean?
No churn means you do not need an ice cream maker or any special equipment to make this ice cream. The mixture is combined and frozen directly, making it incredibly easy and accessible.
Can I use other plant-based creams besides coconut?
Absolutely! While coconut double cream is ideal for its thickness and flavor, you can try other thick plant-based creams, but check that they whip or combine well to maintain the creamy texture.
Is this recipe nut-free?
Yes, this particular recipe is naturally nut-free if you choose a dairy-free double cream that is nut-free and vegan condensed milk without nuts—perfect for those with allergies.
Can I add mix-ins like nuts or fruit?
Definitely! Adding chopped nuts, vegan chocolate chunks, or dried fruit can add texture and flavor. Just fold them in gently before freezing for an even distribution.
How do I get a scoopable texture without an ice cream machine?
The combination of dairy-free cream and vegan condensed milk creates a creamy structure that freezes solid but soft enough to scoop after a brief stint at room temperature. Whisking well helps incorporate air for a lighter texture too.
Final Thoughts
Now that you’ve got the inside scoop on how to make this incredibly simple yet indulgent Vegan Chocolate Ice-Cream (No Churn), it’s time for you to dive in and experiment in your own kitchen. It’s a dreamy treat that satisfies any chocolate craving without complicated steps or equipment. Trust me, once you make this, you’ll find yourself coming back to it time and again during warm days and dessert occasions alike. Enjoy every luscious spoonful!