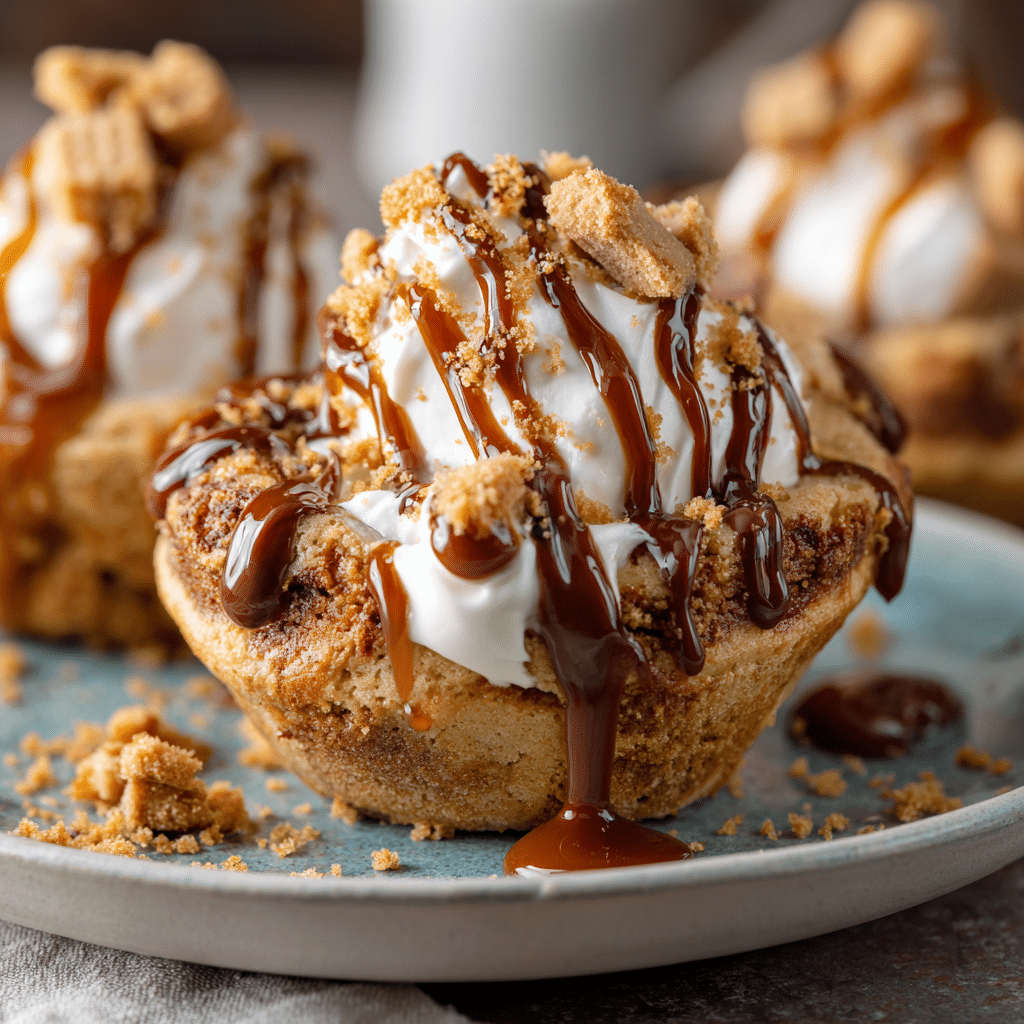
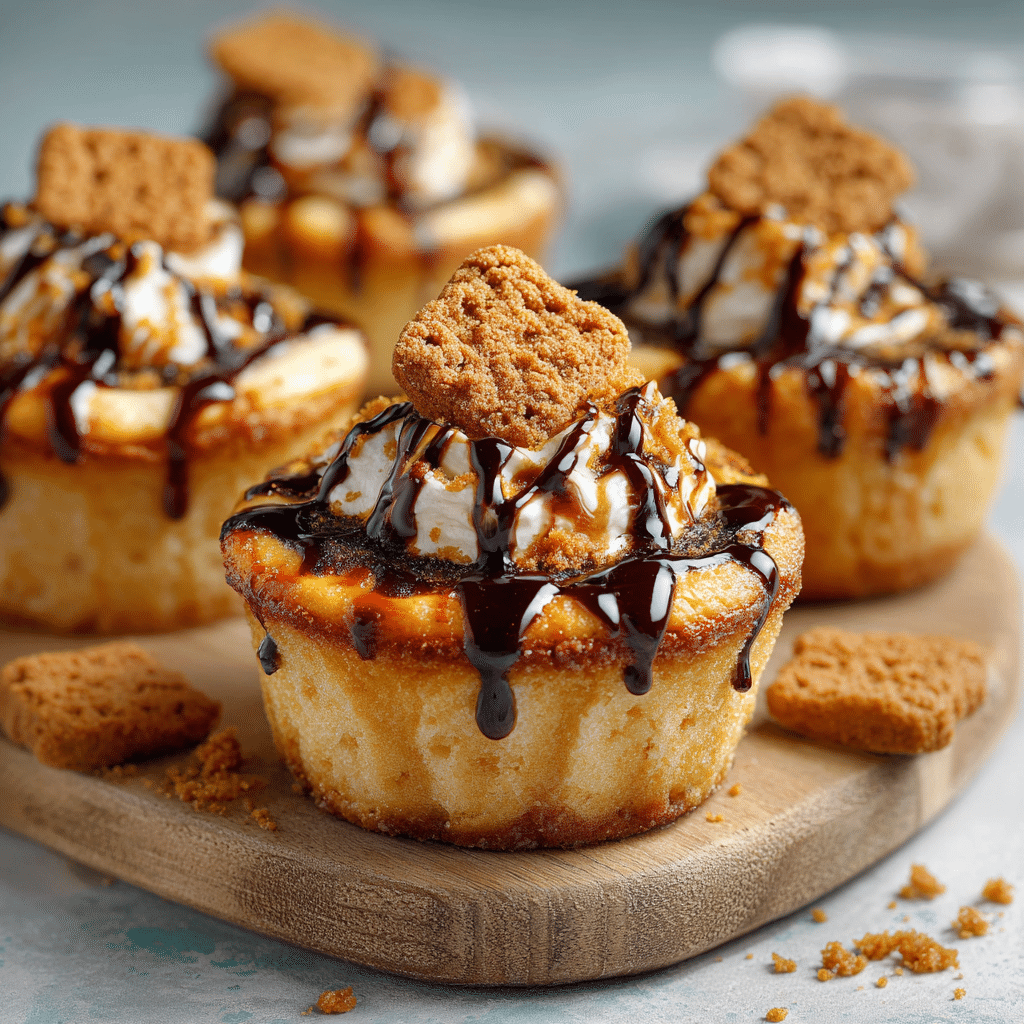
Biscoff Lava Pancake Cups Recipe
If you have a soft spot for pancakes and a secret love for that irresistible Biscoff spread, then you are in for a real treat with these Biscoff Lava Pancake Cups. These delightful mini pancake cups filled with melted Biscoff spread combine the best of both worlds, offering a warm, gooey center that oozes with rich caramelized flavors inside a fluffy pancake shell. Perfect for breakfast, brunch, or even a cozy dessert moment, this recipe elevates simple pancake batter into an unforgettable indulgence that’s as fun to make as it is to eat.
Ingredients You’ll Need
To create these scrumptious Biscoff Lava Pancake Cups, you will need just a handful of ingredients that pack incredible flavor and texture. Each one plays a special role, from the tender pancake cups to the luscious, molten Biscoff center.
- Pancake batter: Use your favorite homemade or store-bought batter for that fluffy, golden base that’s light yet sturdy enough to hold the molten filling.
- Biscoff spread: The star ingredient that brings a sweet, spiced caramel flavor with a velvety texture – this is what makes the centers melt gloriously.
- Powdered sugar: A delicate dusting that adds a touch of sweetness and a pretty finish to your pancake cups after baking.
How to Make Biscoff Lava Pancake Cups
Step 1: Prep Your Muffin Tin
Begin by preheating your oven and lightly greasing a muffin tin. This step ensures your pancake cups will release easily after baking without sticking or falling apart. Using a little oil or non-stick spray works wonders here.
Step 2: Fill the Pancake Cups
Next, pour your pancake batter into each muffin cup, filling about halfway. This creates space for the amazing Biscoff lava to nestle in the center. You want enough batter for the base and the top coating, so don’t overfill.
Step 3: Add the Biscoff Center
Take a generous teaspoon of Biscoff spread and place it right in the middle on top of the batter in each cup. This will melt into a luscious molten core during baking, so don’t be shy with the filling!
Step 4: Cover with More Batter
To seal in the gooey center, carefully spoon more pancake batter over the Biscoff spread, filling each cup almost to the top. This sandwiching technique locks in the lava filling, creating that delightful surprise when you bite in.
Step 5: Bake to Perfection
Place the muffin tin in the oven and bake until the pancake cups are puffed up, golden brown, and cooked through. The heat will gently melt the Biscoff spread inside, creating a warm, gooey core that complements the fluffy pancake shell beautifully.
How to Serve Biscoff Lava Pancake Cups
Garnishes
A sprinkle of powdered sugar over the warm Biscoff Lava Pancake Cups adds a lovely touch of sweetness and an inviting snowy look. Feel free to add a dollop of whipped cream or a drizzle of maple syrup for extra indulgence.
Side Dishes
Serve these delightful cups alongside fresh fruits like mixed berries or sliced bananas to balance the richness with bright, refreshing flavors. A side of crispy bacon or sausage can also provide a savory contrast that makes the whole meal well-rounded.
Creative Ways to Present
For a playful twist, try stacking a couple of Biscoff Lava Pancake Cups on a dessert plate and drizzle with warm chocolate or caramel sauce. You could also serve them in small dessert bowls with a scoop of vanilla ice cream for a remarkable breakfast-dessert fusion.
Make Ahead and Storage
Storing Leftovers
If you have any leftover Biscoff Lava Pancake Cups, store them in an airtight container in the refrigerator for up to 3 days. This helps retain their fluffy texture while keeping the rich filling fresh and gooey once reheated.
Freezing
These pancake cups freeze beautifully! Arrange cooled cups on a baking sheet to freeze individually before transferring them to a freezer-safe bag. This way, you can enjoy a quick indulgence whenever the craving hits, keeping well for up to a month.
Reheating
To reheat, pop the frozen or refrigerated pancake cups into the oven at a low temperature until warmed through and the filling is melted again. Microwaving works in a pinch but can make the pancakes a bit soggy, so the oven is best to retain that wonderful texture.
FAQs
Can I use homemade pancake batter for Biscoff Lava Pancake Cups?
Absolutely! Homemade batter often adds a personal touch and can be adjusted for flavor and texture to your liking. Just make sure it’s not too thin, so it holds the Biscoff lava inside without leaking.
What’s the best way to prevent the Biscoff spread from leaking during baking?
Filling each muffin cup only halfway before adding Biscoff and then covering it with more batter creates a sturdy seal that keeps the filling from oozing out during baking.
Can I substitute Biscoff spread with another filling?
While Biscoff spread offers a unique and delicious flavor, you can experiment with peanut butter, Nutella, or even fruit jams to customize your pancake cups. Keep in mind that the consistency should be thick enough to melt but not runny.
Are Biscoff Lava Pancake Cups suitable for kids?
Yes! Kids often love the surprise molten center and the sweet, cozy flavor. Just be sure to let the cups cool slightly before serving to avoid any burns from the hot filling.
How long do I bake the pancake cups?
Bake them until they are golden brown and cooked through, usually about 12-15 minutes at around 350°F (175°C). Check by inserting a toothpick near the edges—not too close to the filling—to ensure the batter is set.
Final Thoughts
If you’re searching for a new favorite breakfast or a sweet treat that feels like a hug in every bite, these Biscoff Lava Pancake Cups are your answer. They bring together that pillowy pancake goodness and the heavenly, spiced sweetness of Biscoff in a way that’s utterly irresistible. Trust me, once you make these, they’ll quickly become a staple whenever you want to spoil yourself or delight loved ones with something truly special.