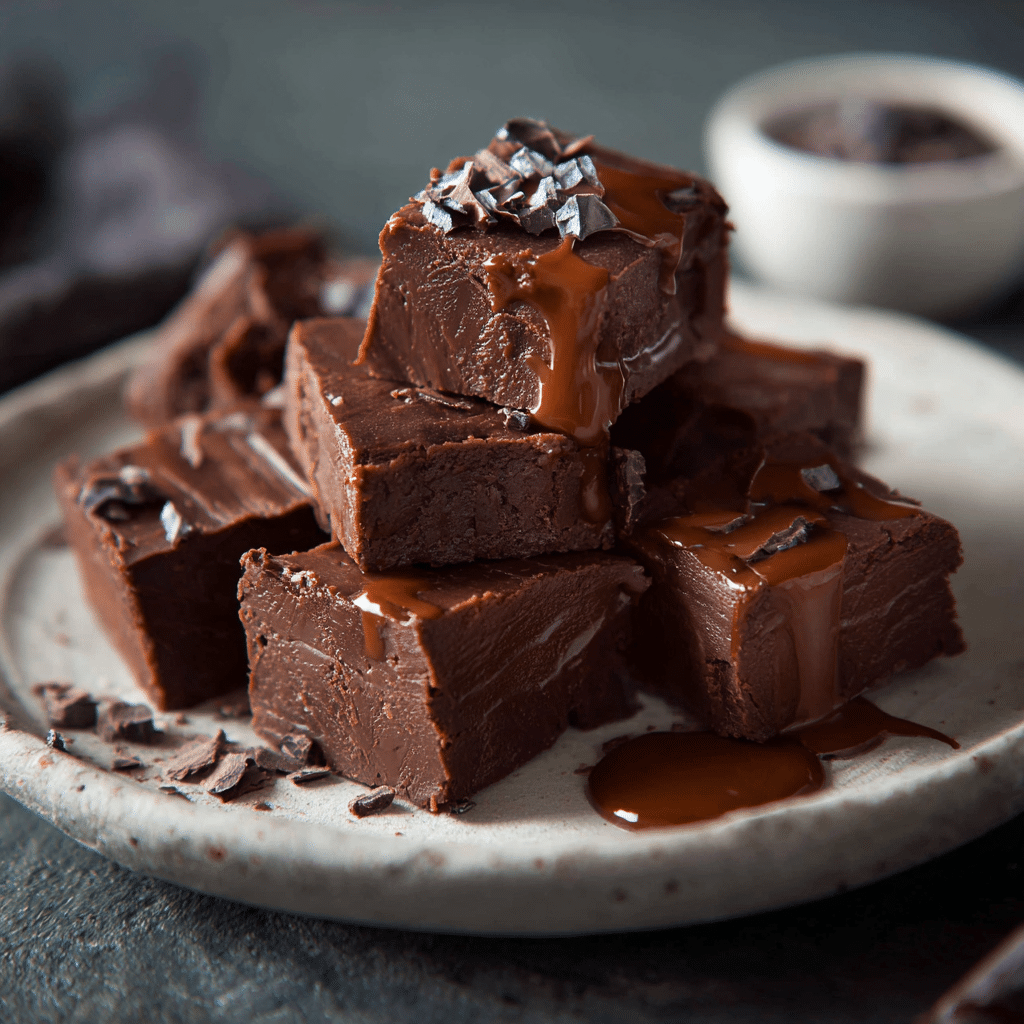
Chocolate Fudge Recipe
If you have a soft spot for irresistibly rich and dense chocolate squares, then this Chocolate Fudge is going to become your absolute go-to treat. This classic recipe delivers that perfect creamy texture and deep chocolate flavor that feels downright luxurious but is surprisingly simple to make at home. Whether you’re sharing with friends, gifting during the holidays, or sneaking a piece when no one’s watching, these bites of Chocolate Fudge never fail to satisfy a craving for something sweet, smooth, and utterly delightful.
Ingredients You’ll Need
Ingredients You’ll Need
The magic of Chocolate Fudge starts with just a handful of simple, pantry-friendly ingredients that come together to create a decadent masterpiece. Each item plays a critical role, from that luscious creaminess to the intense chocolatey flavor and perfect melt-in-your-mouth texture.
- Chocolate: Choose a quality semi-sweet or dark chocolate for a rich flavor that really shines through.
- Condensed milk: This adds sweetness and a creamy texture, helping the fudge set beautifully without any graininess.
- Butter: Adds a silky smoothness and enhances the overall richness of the fudge.
How to Make Chocolate Fudge
Step 1: Melt the Ingredients
Start by gently melting the chocolate, condensed milk, and butter together in a heatproof bowl over simmering water or in short bursts in the microwave. Stir continuously to combine everything until you have a glossy and smooth mixture with no lumps. This careful melting step is key to achieving the luscious texture characteristic of perfect Chocolate Fudge.
Step 2: Mix Until Smooth
Once melted, keep stirring the mixture to ensure the butter is fully incorporated and the chocolate is silky. This step helps the fudge set evenly and prevents any gritty texture. Taking your time here makes a world of difference in the final bite.
Step 3: Pour and Chill
Pour the glossy fudge mixture into a lined, square baking dish or pan. Smooth the top with a spatula and pop it into the refrigerator. Let it chill, for at least a few hours or until completely firm. This chilling is where the magic happens—the fudge solidifies into those dense, rich squares you’re craving.
Step 4: Cut into Perfect Cubes
Remove your set fudge from the fridge and carefully lift it from the pan using the lining paper. Use a sharp knife to cut it into neat, bite-sized cubes. These rich cubes are the ideal indulgent snack or gift, ready to bring smiles with every creamy, chocolatey bite.
How to Serve Chocolate Fudge
Garnishes
Although fantastic on its own, Chocolate Fudge can shine even more when garnished thoughtfully. A sprinkle of flaky sea salt on top adds a lovely contrast to the sweetness, highlighting the deep chocolate flavor. You can also try finely chopped nuts like pistachios or almonds for some delightful crunch and visual appeal.
Side Dishes
Chocolate Fudge pairs wonderfully with a variety of accompaniments. Serve it alongside a scoop of vanilla ice cream for a classic dessert combo, or add some fresh berries to cut through the richness. A cup of strong coffee or rich black tea also complements the fudgy texture and balances the sweetness nicely.
Creative Ways to Present
For special occasions, present your Chocolate Fudge on a decorative platter or in festive boxes lined with parchment paper. Another charming idea is to thread cubes onto small skewers alternating with marshmallows or fresh fruit for a fun and bite-sized dessert kabob. These creative touches elevate this humble treat to party-worthy status in no time.
Make Ahead and Storage
Storing Leftovers
Chocolate Fudge stores beautifully in an airtight container at room temperature for up to a week. Keeping it sealed ensures the fudge stays moist and prevents it from absorbing any unwanted smells in the fridge or pantry.
Freezing
If you want to keep your batch fresh for longer, you can freeze the fudge. Wrap individual cubes tightly in plastic wrap before placing them in a freezer-safe container. Frozen fudge holds up well for several months and can be thawed overnight in the refrigerator before enjoying.
Reheating
Chocolate Fudge is best enjoyed cold or at room temperature, but if you prefer it softer, simply let it sit out for 10–15 minutes. Avoid reheating in the microwave as it may change the texture and cause the fudge to become grainy instead of creamy.
FAQs
Can I use milk chocolate instead of dark chocolate?
Absolutely! Milk chocolate will make your fudge sweeter and creamier, which many people love. Just keep in mind it may set softer and have a different flavor balance than using darker chocolate.
Do I need to use condensed milk for this recipe?
Yes, condensed milk is crucial here as it adds both sweetness and the silky, creamy texture essential for good fudge. Substituting it may alter the consistency drastically.
How long does Chocolate Fudge take to set?
Typically, it needs at least 2 to 4 hours in the refrigerator to firm up properly. For best results, leaving it overnight is a great idea to ensure a perfect set.
Can I add nuts or other flavorings to the fudge?
Definitely! Chopped nuts, a splash of vanilla extract, or even a pinch of sea salt can enhance the flavor and texture. Add them after melting the chocolate mixture and before chilling.
What can I do if my fudge turns out grainy?
Graininess usually means the chocolate or sugar wasn’t fully melted or mixed. Make sure to melt gently and stir continuously during the process to get that smooth, creamy finish every time.
Final Thoughts
This Chocolate Fudge recipe is truly a treasure for anyone who loves a simple yet indulgent dessert that always impresses. Once you make your first batch and enjoy those rich, creamy squares melting in your mouth, you’ll understand why it’s such a beloved classic. Don’t hesitate to give it a try—you might just find your new favorite treat to share and savor!