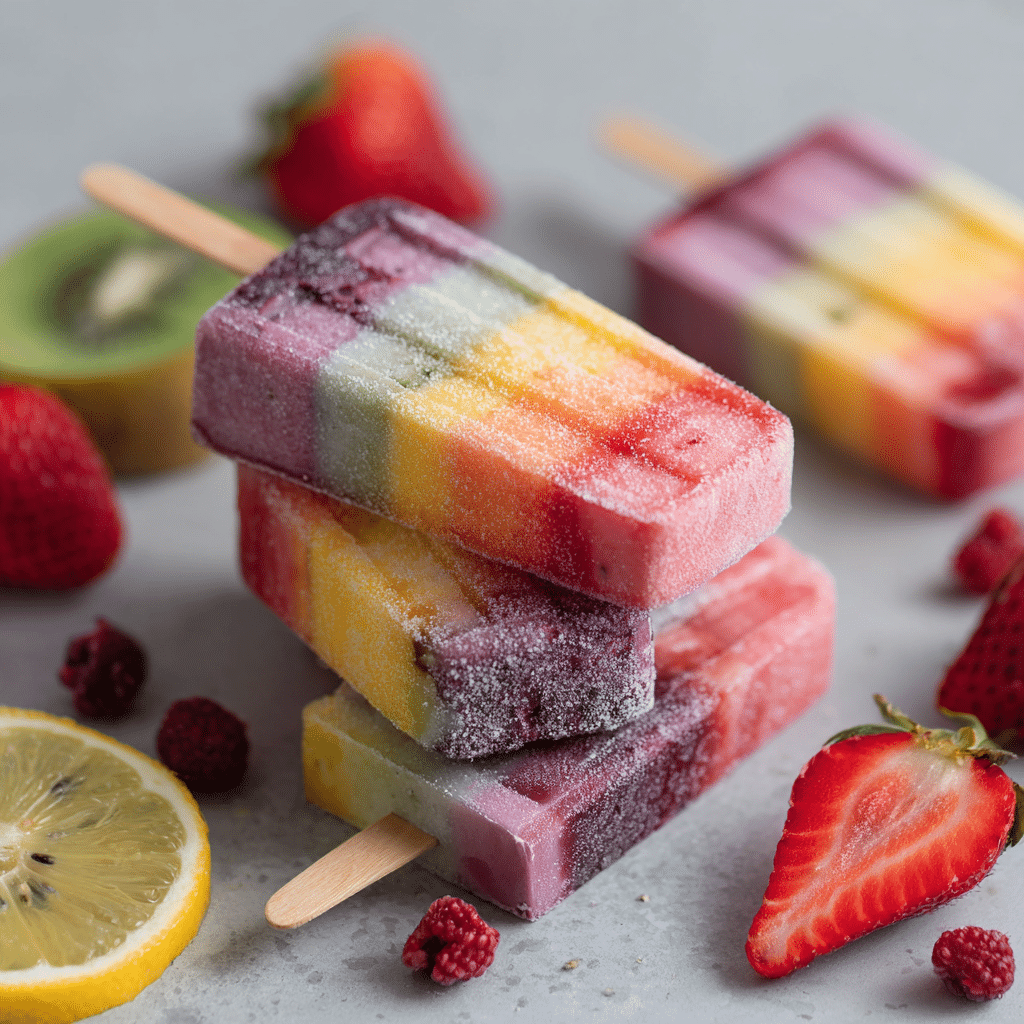
Rainbow Fruit Popsicles Recipe
If you’re dreaming of a vibrant, refreshing treat that’s bursting with natural sweetness and wholesome goodness, the Rainbow Fruit Popsicles Recipe is exactly what you need. These colorful frozen popsicles, crafted with layers of fresh fruit puree, combine the juicy flavors of strawberries, mango, and kiwi with creamy yogurt and a touch of honey for just the right amount of sweetness. Perfect for hot summer afternoons or as a guilt-free dessert, these popsicles are as fun to make as they are delicious to eat, bringing a splash of color and joy to every bite.
Ingredients You’ll Need
Gathering these simple, fresh ingredients is the first step to making your Rainbow Fruit Popsicles Recipe truly shine. Each element plays a crucial role: strawberries add a bright tang, mango delivers tropical sweetness, kiwi offers a zesty kick, yogurt lends creaminess, and honey ties everything together with natural sweetness and smooth texture.
- Strawberries: Use ripe, juicy strawberries for rich red color and vibrant flavor.
- Mango: Choose sweet, soft mangoes to create a smooth, tropical orange layer.
- Kiwi: Fresh kiwi brings a refreshing green hue and tartness to balance the sweetness.
- Yogurt: Opt for plain or vanilla yogurt to add creaminess and a slight tang.
- Honey: A drizzle of honey gently sweetens the fruit purees without overpowering them.
How to Make Rainbow Fruit Popsicles Recipe
Step 1: Prepare Each Fruit Puree
Start by washing and peeling your fruits as needed. Blend the strawberries into a smooth puree, then do the same separately for the mango and kiwi. Mix a bit of honey into each fruit puree to gently enhance their natural sweetness. For the creamy layer, whisk the yogurt until smooth to ensure it’s easy to pour.
Step 2: Layer the Popsicles
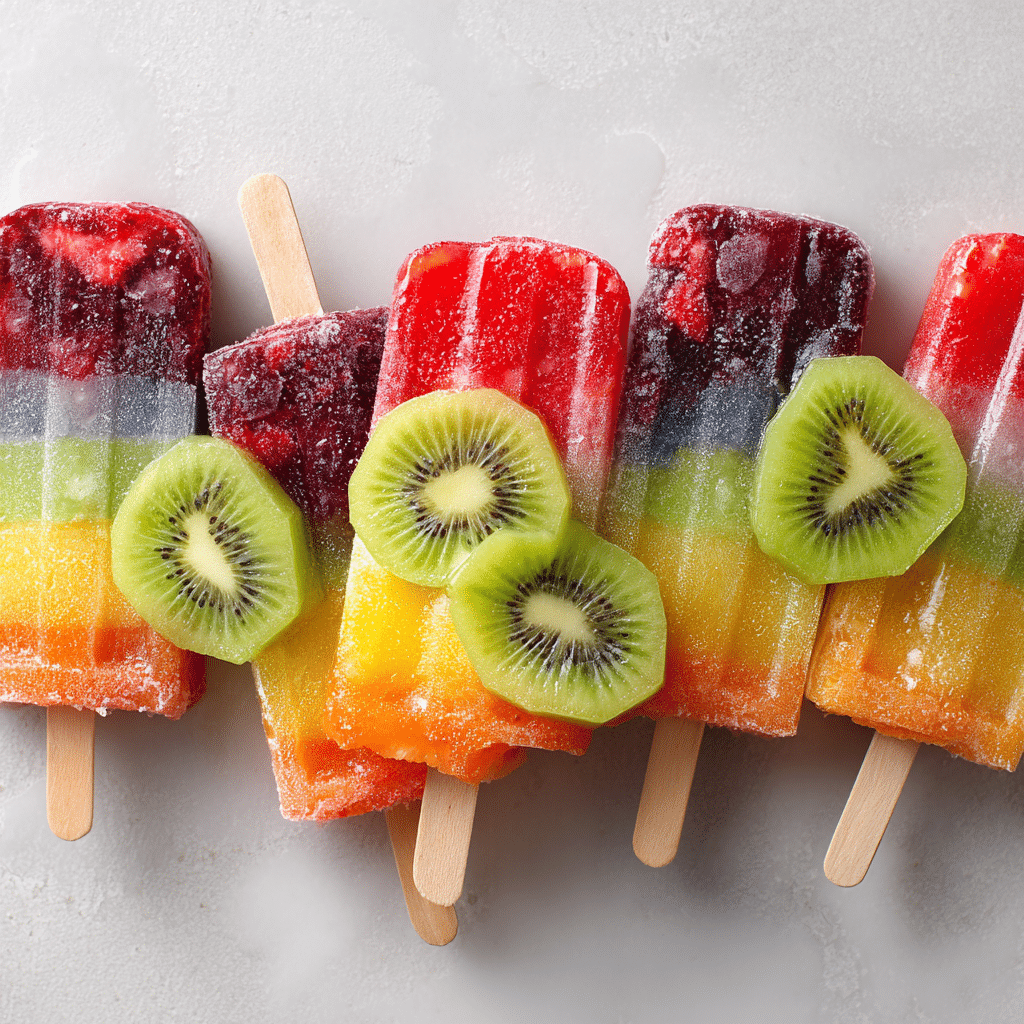
Begin by spooning the strawberry puree into your popsicle molds, creating a bright red base layer. Freeze this layer for about 20 minutes until it firms up enough to hold the next layer without melting. Next, add the mango puree, then freeze again. Follow with the kiwi puree, layering beautifully to showcase the rainbow effect. After the fruit layers, add a creamy yogurt layer to top it off before inserting the sticks.
Step 3: Freeze Completely
Place the popsicle molds in the freezer for at least 4 hours, or overnight if possible. This step is essential to get that perfect, firm texture so your Rainbow Fruit Popsicles Recipe holds its shape well and is refreshing to bite into.
How to Serve Rainbow Fruit Popsicles Recipe
Garnishes
Adding a garnish elevates the fun and makes these popsicles even more appealing. Consider fresh mint leaves, a sprinkle of finely chopped nuts, or a few whole berries on the side for a pretty and tasty touch that pairs well with the fruity flavors.
Side Dishes
These popsicles are fantastic on their own, but you can also serve them alongside light summer salads, coconut rice, or a simple bowl of fresh fruit to create a delightful, healthful spread that’s perfect for warm days and backyard gatherings.
Creative Ways to Present
For a playful twist, use clear popsicle molds so the vibrant layers are visible. You can even thread some small fruit chunks onto the sticks before freezing for extra texture. Serving them in colorful napkins or small cups makes the experience even more joyful and inviting.
Make Ahead and Storage
Storing Leftovers
If you happen to make more popsicles than needed, keep them in an airtight container or tightly wrapped in plastic wrap to prevent freezer burn, ensuring your Rainbow Fruit Popsicles Recipe stays fresh and flavorful for future enjoyment.
Freezing
Proper freezing is key to preserve the vibrant colors and textures. Always freeze your popsicles upright in sturdy molds, and allow enough time for them to freeze solid to maintain their perfect shape and icy refreshment when served.
Reheating
Since these are frozen treats, reheating isn’t applicable; however, letting them sit at room temperature for a few minutes before serving helps soften them just enough for easier enjoyment without losing that cool, refreshing burst you’re looking for.
FAQs
Can I use frozen fruit instead of fresh?
Absolutely! Frozen fruit works well and can even make the blending process easier. Just thaw it slightly for smoother purees, but keep in mind fresh fruit often provides the best vibrant colors and texture.
How long do these popsicles last in the freezer?
When stored properly, your Rainbow Fruit Popsicles Recipe should remain delicious for up to 2 weeks. Beyond that, they may start developing freezer burn or lose flavor.
Can I substitute yogurt with a dairy-free option?
Yes! Coconut yogurt or almond milk yogurt are fantastic dairy-free alternatives that maintain creaminess and complement the fruit layers really well for those avoiding dairy.
Is it possible to add other fruits?
Definitely. This recipe is super versatile. Try berries, pineapple, or even melon to create your own personalized rainbow. Just blend each fruit separately to keep the colorful layers distinct.
How do I prevent the fruit layers from mixing?
Freezing each layer until it’s firm before adding the next is key. This allows the layers to set properly and prevents them from blending together, keeping that beautiful rainbow effect intact.
Final Thoughts
The Rainbow Fruit Popsicles Recipe is a joyous way to celebrate fresh fruit and bring a burst of color and flavor to any day. Whether you’re cooling off after a long afternoon or surprising the kids with a fun summer snack, these popsicles are simple to make and delightful to enjoy. Give it a try—you might just find your new favorite frozen treat that’s as beautiful as it is delicious!